
GitHub task automation with serverless actions
Originally published on: https://developer.ibm.com/tutorials/github-task-automation-with-serverless-actions
GitHub permissions get complicated. There are nuances to understanding what an owner can do vs what a member can do. So as your organization grows, more restrictions may be placed on what members can do. Here’s a problem we ran into at my day job:
- We have a public GitHub presence at github.com/xyz.
- Members of the
xyzare not allowed to create repos by default. - New repo requests were emailed to org owners and they are done manually. (Boo.)
This tutorial shows an easy to use way to request new repos be made for a GitHub org. It involves asking members to request new repos by filing issues in a specific repo (the example solution uses a GitHub Enterprise instance, but any GitHub repo would work). This allows for multiple owners to see the same queue, and gives you a record of how many requests have been made. (Plus, I just wanted to mess around with serverless, so this was a good excuse.)
Here’s how it looks at a high level:

- A user files a GitHub issue with details about a repo they want created.
- When an issue is approved, a payload is sent to a serverless action.
- The serverless action calls some Python code.
- Using the Python requests module, you call GitHub APIs.
By completing this tutorial, you will understand how to:
- Set up an action with IBM Cloud Functions.
- Trigger an action from IBM Cloud Functions with a webhook.
- Interact with the GitHub API.
Prerequisites
- A free tier IBM Cloud account.
- A GitHub account.
- A GitHub organization where you are the owner. You can create your own organization if you don’t have access to one.
Estimated time
Walking through this tutorial should take you about 45 minutes.
Steps
This tutorial is split into a few parts:
- Generate a GitHub personal access token.
- Create a serverless trigger and action.
- Set up a GitHub repo for webhooks.
- Run it!
- Take a deeper look at the code.
1. Generate a GitHub personal access token
Generate a personal access token so you can call GitHub APIs programmatically (from your Python code). This is extensively documented on GitHub, but in short, perform the following to generate a personal access token:
- From your GitHub profile settings, click on Developer Settings
- Select Personal access tokens.
- Click Generate new token.
- Ensure the repo option is selected.
- Click Generate token at the bottom.
A random string of characters will be generated. Copy and paste these somewhere safe, as you’ll need them in the next few steps. Repeat this step if you are using a GitHub Enterprise account in your setup.
2. Create a serverless trigger and action
To start creating a trigger or action, you need to log into IBM Cloud and select the Fuctions option from the Navigation Menu, or go to it directly.
Create a custom trigger
The first thing you need to do on IBM Cloud is to create a serverless trigger. By creating a trigger, you will have a URL to provide to your GitHub webhook. The GitHub webhook will trigger whenever an event (such as a new issue or new pull request) happens and send a payload (such as a JSON interpretation of the event) to the URL associated with your serverless trigger.
-
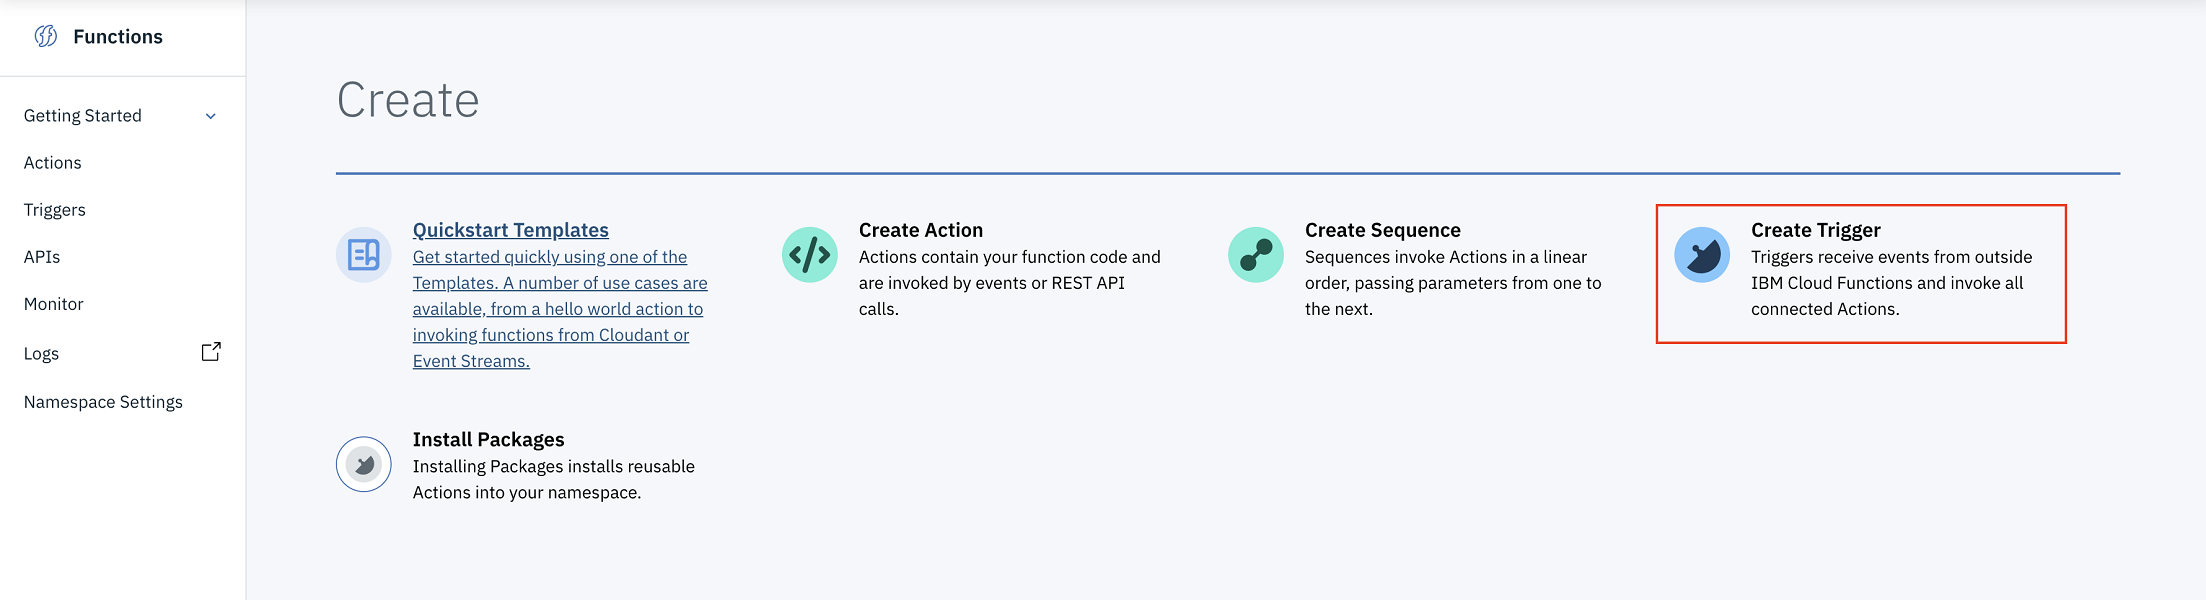
From the Functions overview page, select Create Trigger.
-
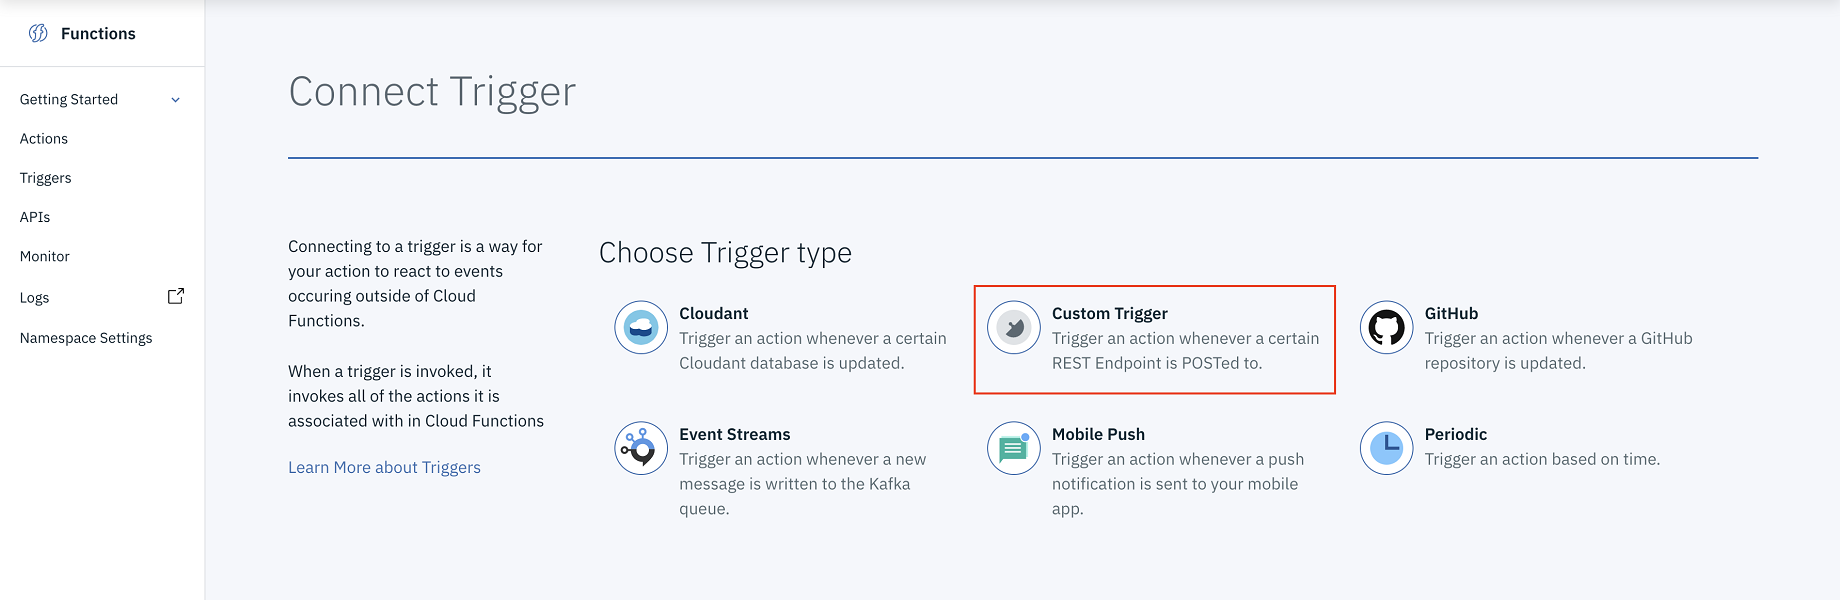
Choose the Custom Trigger option.
-
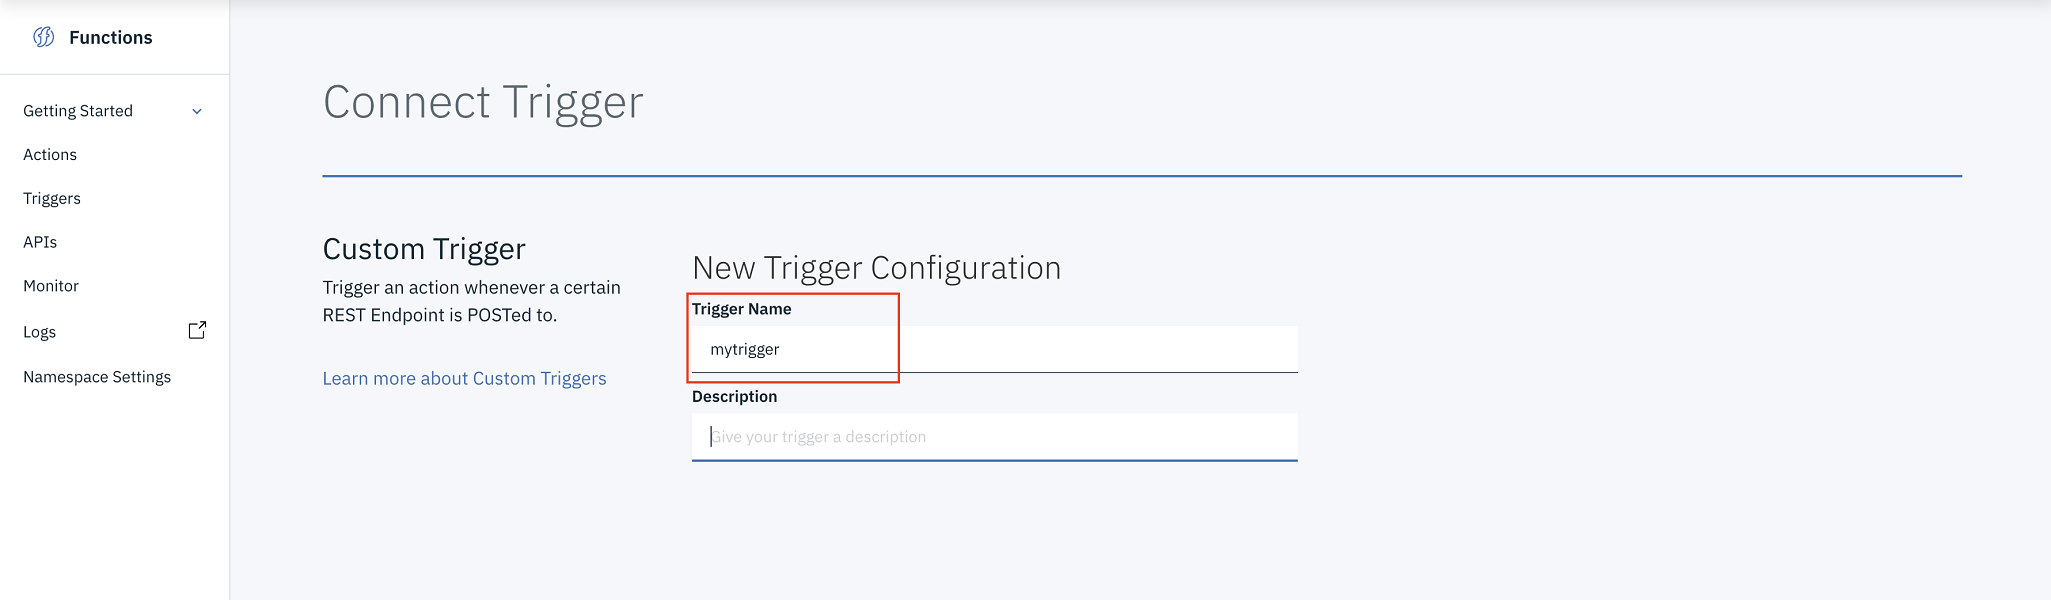
Give the new trigger a name and enter a description.
-
Once created, you need to look at the trigger endpoint. Click the eyeball icon to uncover the full URL with the API key and secret.
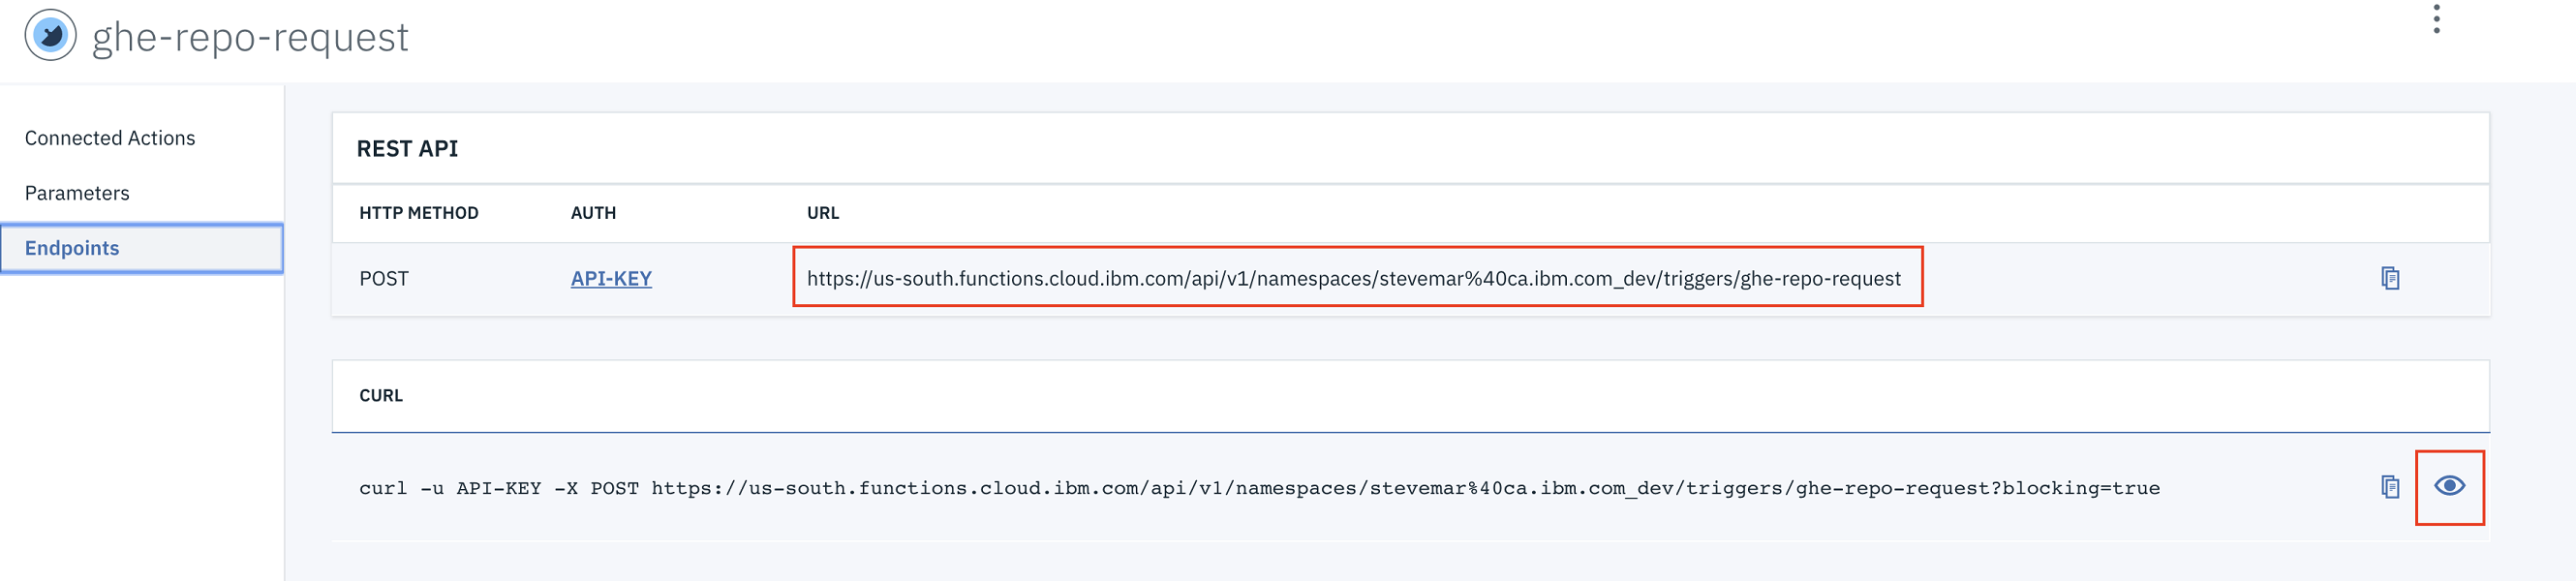
Again, save this URL somewhere since you will need it soon!
Create an action
Now, you will create some Python code (an Action) that will be executed when your trigger is, well, triggered!
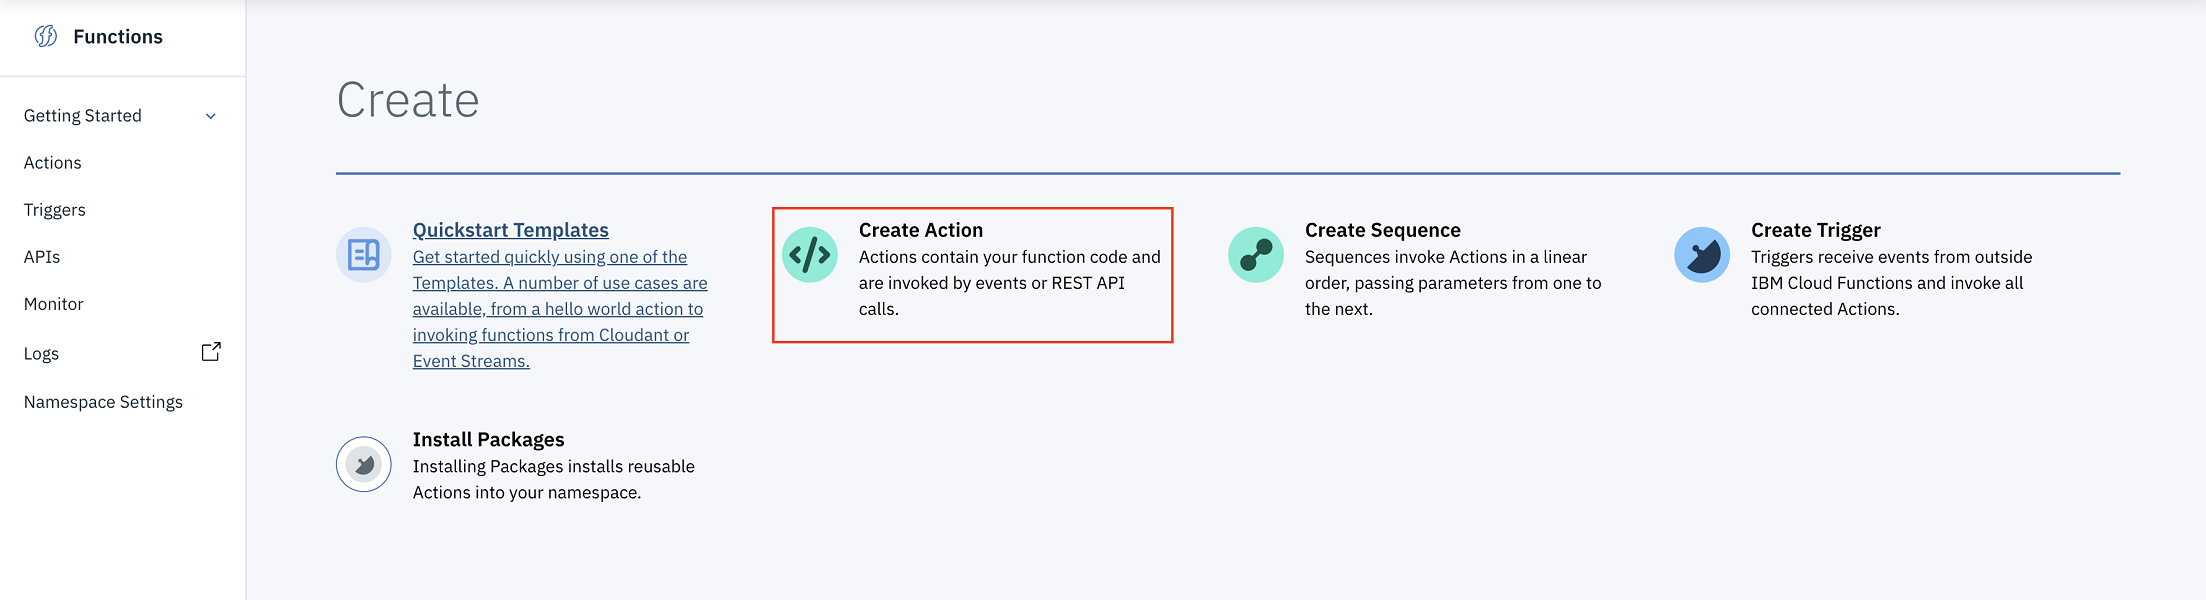
-
From the Functions overview page, choose Create Action.
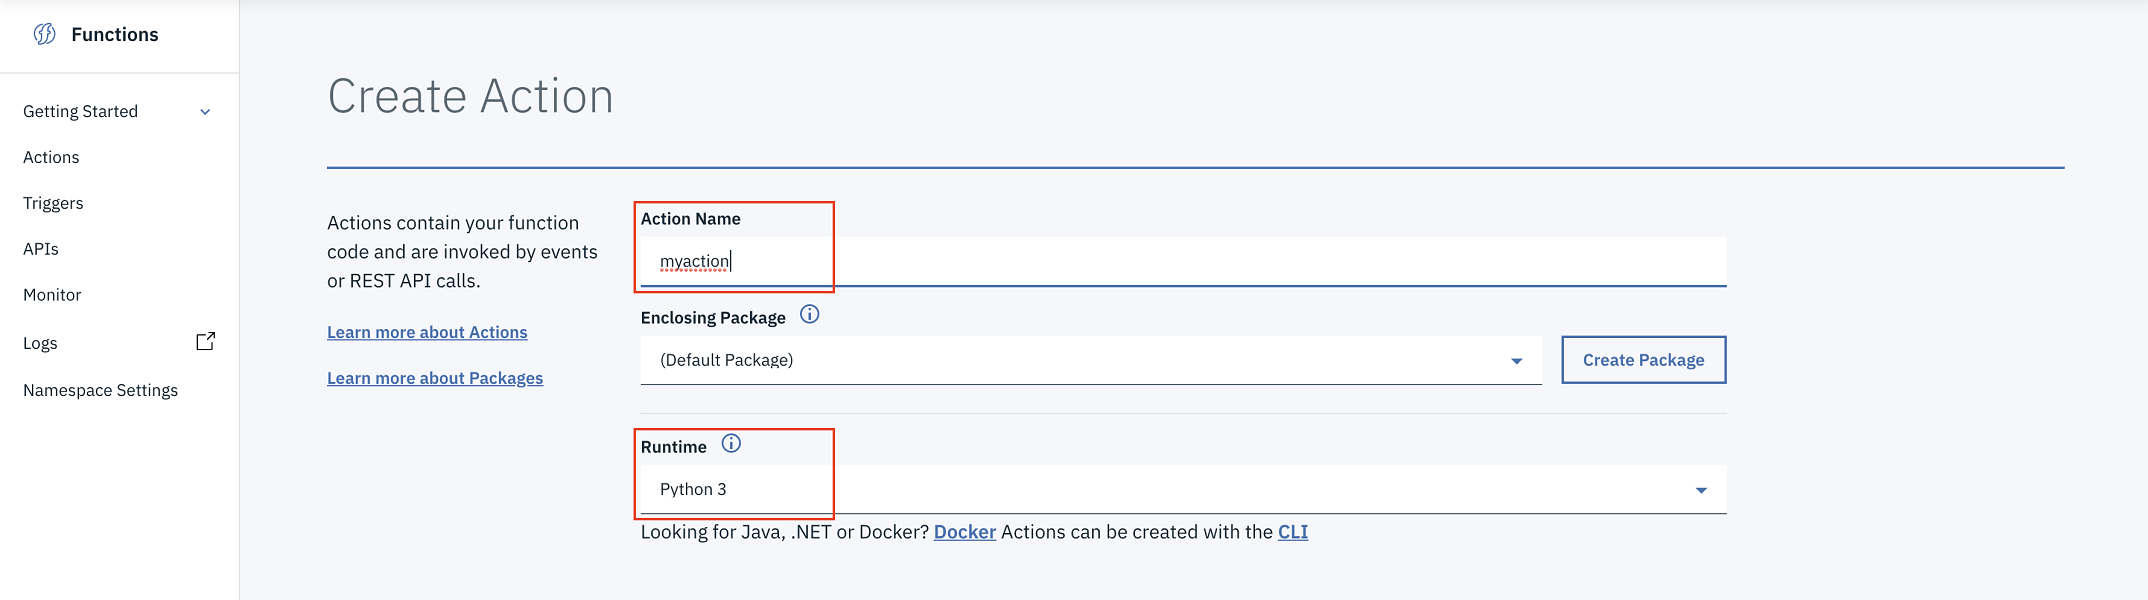
-
Give the new action a name, select the default package, and choose Python 3 as the runtime.
-
Once the editor pops up, copy and paste the code below into the online editor. I’ll go through the code after the tutorial steps.
-
After the action has been created, you need to associate it with the trigger that you created in the previous step. Go to the menu on the left and select the Connected Triggers option.
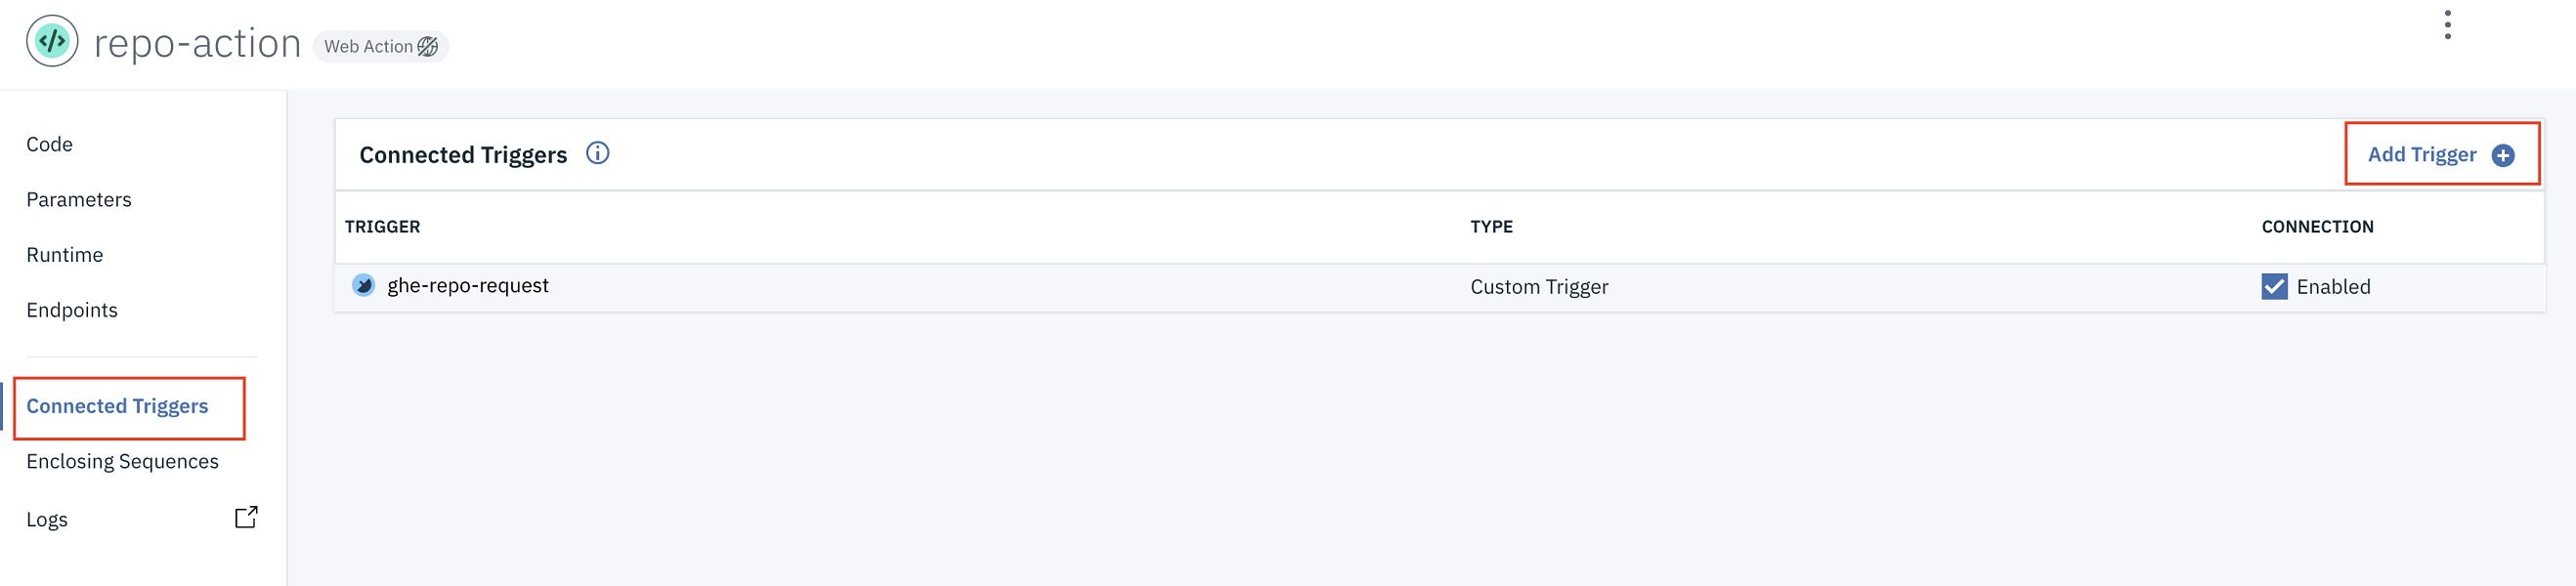
- Click Add Trigger, select Custom Trigger, and find the existing one that you just created.
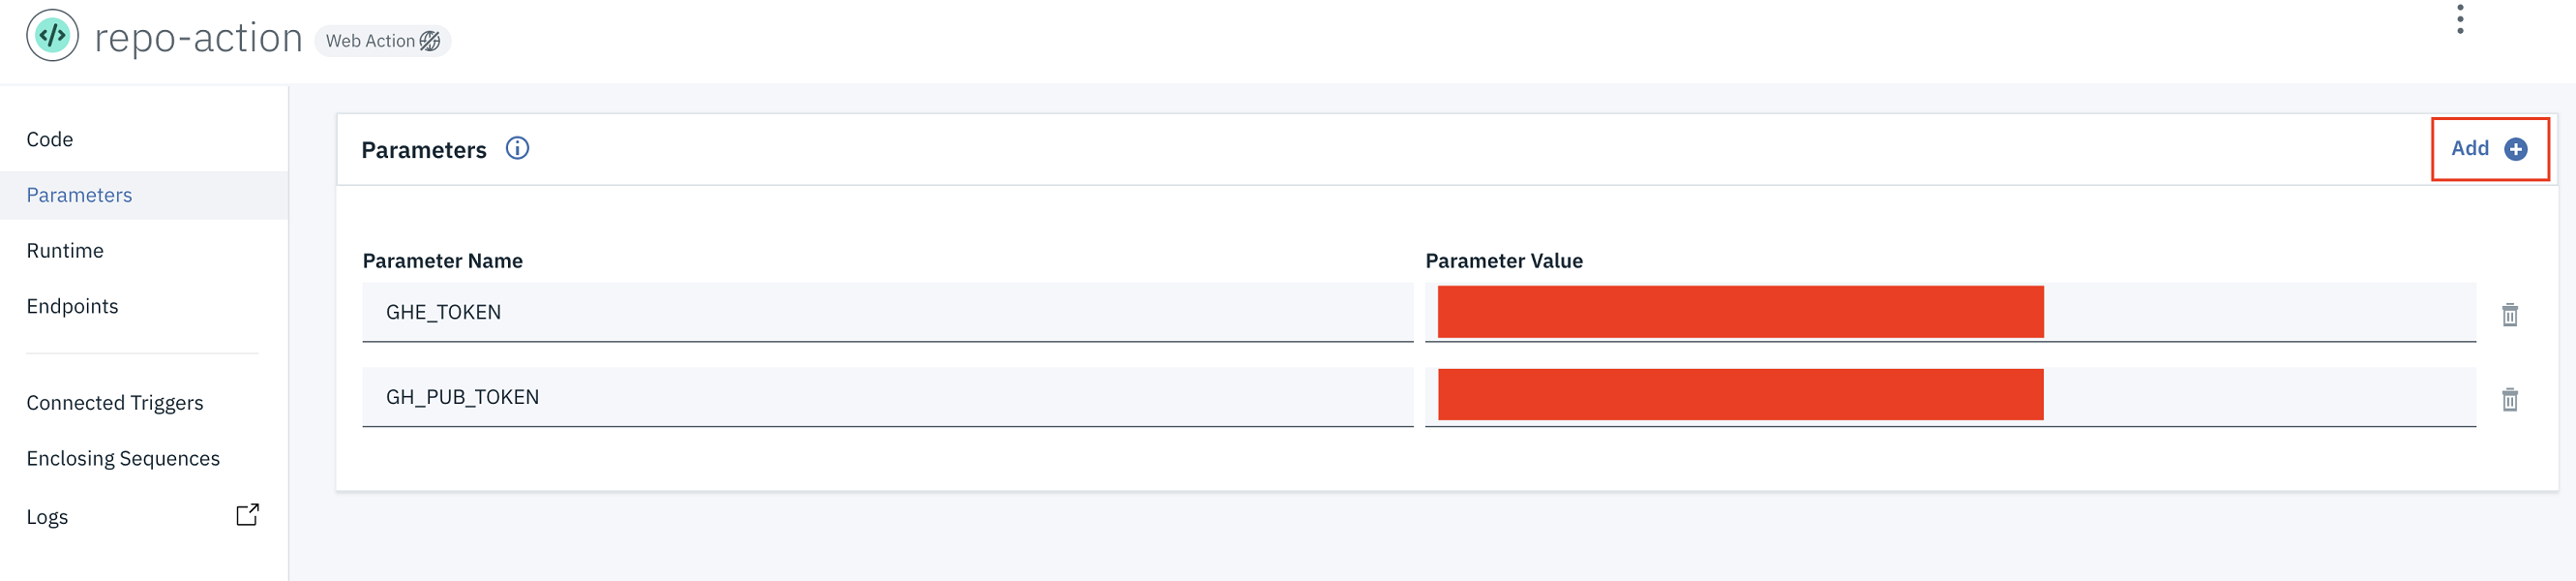
- Go back to the action that was created and find the Parameters menu. You need to add two environment variables,
GHE_TOKENandGH_PUB_TOKEN, as parameters. Use the values that were generated from Step 1. -
Click Add.
You’re almost done!
3. Set up a GitHub repo for webhooks
- Create a GitHub repo where users will file issues to request new repos.
-
Give users an issue template to follow. The one I used is below. It requests a repo name, description, license, and usernames to add as administrators.
## Essentials * name: repo_name * users: user_1, user_2 * description: this is for fun, ain't it grand! * license: apache-2.0 -
In the repo settings, go to the Hooks menu to set up a webhook that will call your serverless trigger.
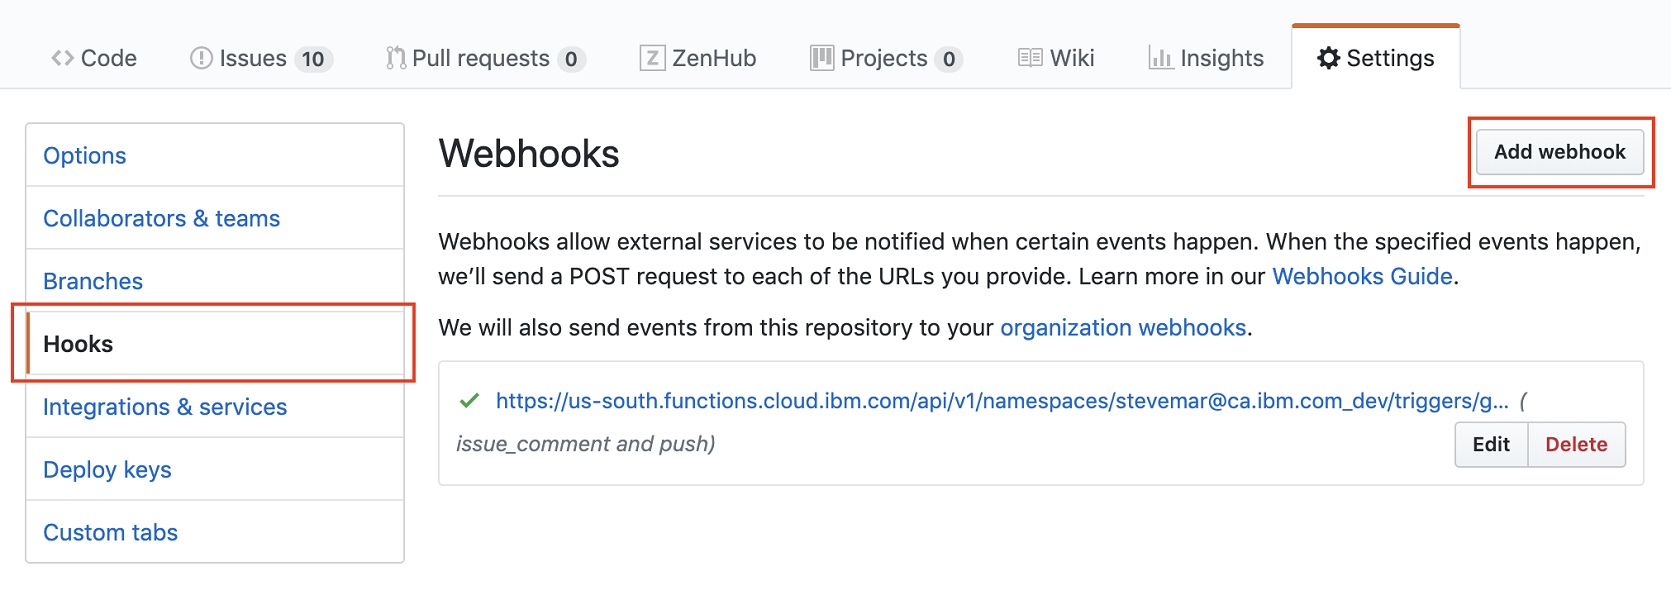
- Create a new webhook. Set the Payload URL to be the trigger endpoint from Step 2.
- Set the Content type to be
application/json. -
Set the SSL verification to be enabled. The payload URL looks like the following:
https://KEY:SECRET@us-south.functions.cloud.ibm.com/api/v1/namespaces/your_namespace/triggers/your_trigger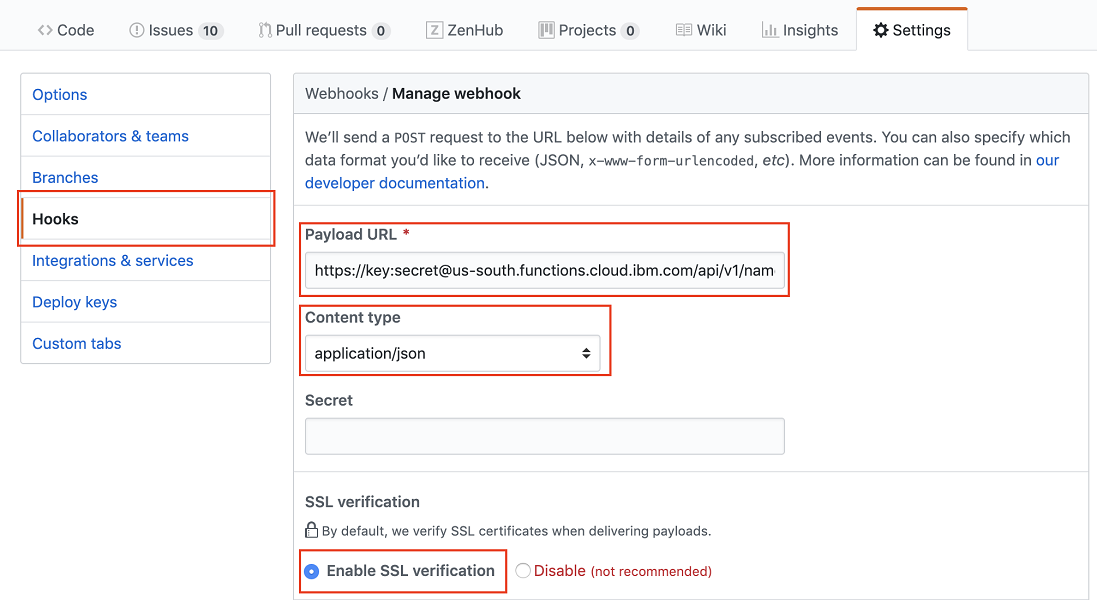
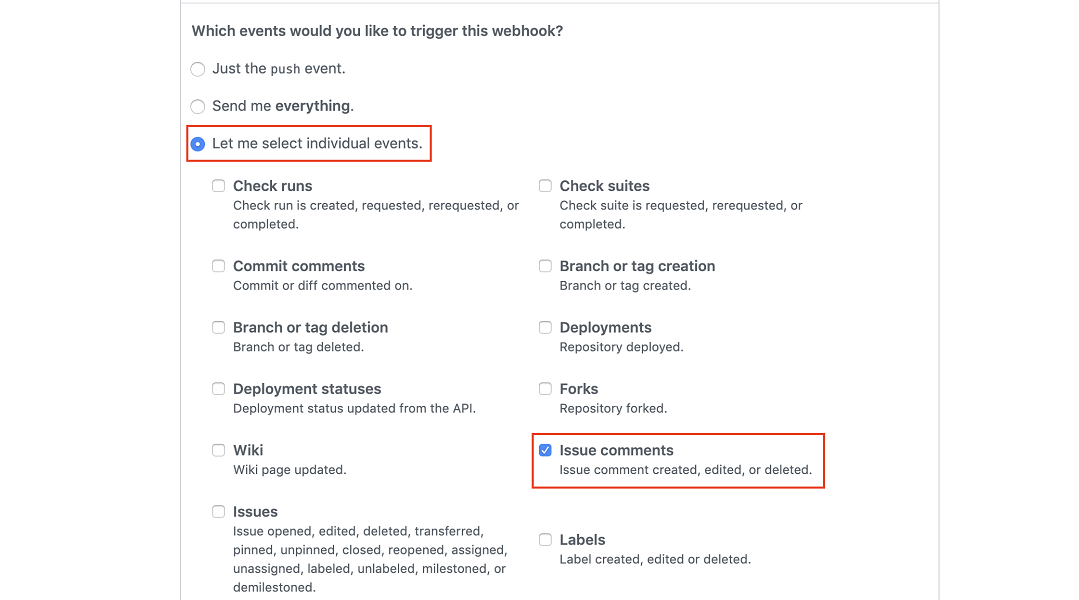
- For the Which events would you like to trigger this webhook? option, choose Let me select individual events.
-
When the list appears, choose Issue comments.
Now that your repo is set up to talk to your action, your action is associated with your trigger. Your trigger also has GitHub tokens to use, so you can finally test it all out!
4. Run it
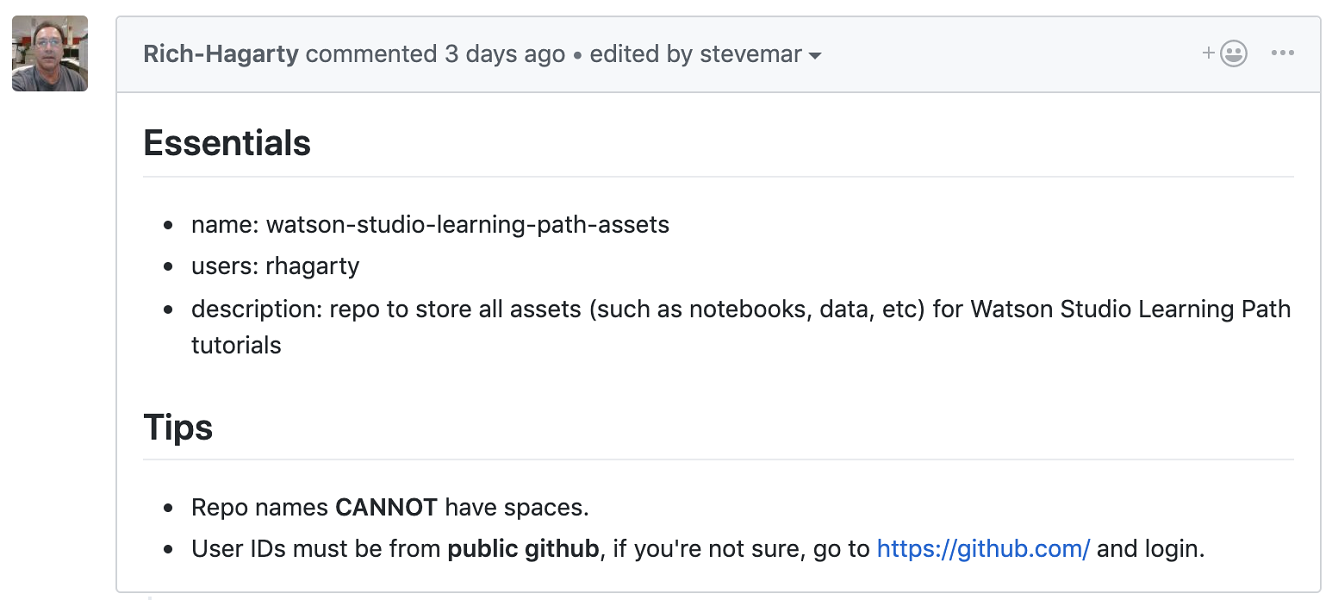
-
Start by having someone file an issue. Below is an example. You can see the repo name and description, usernames to add, and license to use. It’s all there.
-
Leaving any comment would call your trigger, but in your serverless action, you specifically check for an
/approvecomment. So leave that message in the issue and look at the payload that is sent from GitHub to your trigger.
-
Here’s what the payload looks like. It was greatly trimmed for readability, but you can see the issue body, the issue comment, the person who made the comment, and what the issue number is. This entire blob is made available in the
paramsvariable of your serverless action.{ "action": "created", "issue": { "number": 18, "title": "Repo for Studio Learning Path assets", "user": { "login": "Rich-Hagarty", }, "body": "## Essentials\r\n\r\n* name: watson-studio-learning-path-assets\r\n* users: rhagarty\r\n* description: repo to store all assets (such as notebooks, data, etc) for Watson Studio Learning Path tutorials\r\n\r\n## Tips\r\n\r\n* Repo names **CANNOT** have spaces.\r\n* User IDs must be from **public github**, if you're not sure, go to https://github.com/ and login.\r\n*" }, "comment": { "body": "/approve" }, "sender": { "login": "stevemar" } } -
Finally, part of the script in the serverless action posts a follow up comment (indicating that the repo was created) and posts a URL.

5. Take a deeper look at the code
The entire source code used is available on Gist. Let’s take a look at a few code snippets.
Checking the comment sender
Here’s a simple guard, hardcoded to two approvers, to ensure when a /approve comment is left, it’s actually from someone who is trusted. (Not the prettiest, but it works.)
def main(params):

    if params['comment']['body'] == "/approve":

        sender = params['sender']['login']
        if sender == 'stevemar' or sender == 'chrisfer':
            print("proceeding with repo create")
        else:
            return { 'message': 'approve comment made by unauthorized user' }
Parsing markdown
The issue body came in the JSON payload, but it was in raw markdown. I had to get a little clever here to extract the text for all the corner cases and ended up creating several unit tests to ensure edge cases were caught.
def _get_info_from_body(body):

    m = re.search(r'\* name:(.*)(\r\n|$)', body)
    repo_name = m.group(1).strip() if m else None
    repo_name = repo_name.strip() if repo_name else None

    m = re.search(r'\* users:(.*)(\r\n|$)', body)
    users = m.group(1).strip() if m else []
    users = [x.strip() for x in users.split(',')] if users else []

    m = re.search(r'\* description:(.*)(\r\n|$)', body)
    description = m.group(1).strip() if m else ''

    m = re.search(r'\* license:(.*)(\r\n|$)', body)
    license = m.group(1).strip() if m else 'apache-2.0'
    license = license.strip() if license else 'apache-2.0'

    return {'repo_name': repo_name, 'users': users,
            'description': description, 'license': license}
Calling GitHub APIs
The GitHub APIs are very well documented. To call these, I used the python-requests library.
    gh_token = params['GH_PUB_TOKEN']
    # set up auth headers to call github APIs
    headers = {'Authorization': 'token %s' % gh_token}

    # create the repo -- https://developer.github.com/v3/repos/#create
    url = 'https://api.github.com/orgs/' + PUBLIC_ORG + '/repos'
    payload = {
        'name': info['repo_name'],
        'description': info['description'],
        'license_template': info['license'],
        'auto_init': 'true'
    }
    r = requests.post(url, headers=headers, data=json.dumps(payload))
Summary
I hope you enjoyed reading this tutorial as much as I enjoyed writing it. Now you know how to set up an action with IBM Cloud Functions, trigger that action with a webhook, and invoke GitHub APIs using Python code. I hope you can use this to benefit your own organizational workflow.