
GitHub Action to deploy to IBM Kubernetes service
I finally decided to look into GitHub Actions and was surprised to not see IBM Cloud there as an option, so I decided to write my own, largely inspired by the one written for GKE. If this receives enough attention I’ll consider drafting a PR to get it added to GitHub’s community.
For the record, all of the source code I’m referring to is available on https://github.com/IBM/actions-ibmcloud.
I’ll first write about the GitHub Action file itself, show some fun output, then talk about setting up the bits on IBM Cloud.
Oh, one other thing, credit goes to JJ Asghar, and Paul Czarkowski for helping me clean this up. And to Thomas Brumley and Edward Thomson since as far as I can tell, they wrote the original GKE action.
The GitHub Action YAML file
Let’s look at this file in chunks. You can see the file in its entirety in the repo.
This one is the simplest block, give your action and name and choose to deploy on push or on release. Push is easier to debugging so that’s what I’m using. Also, shoutout to the ACT tool for enabling local support for GitHub Actions.
name: Build and Deploy to IKS

on: [push]
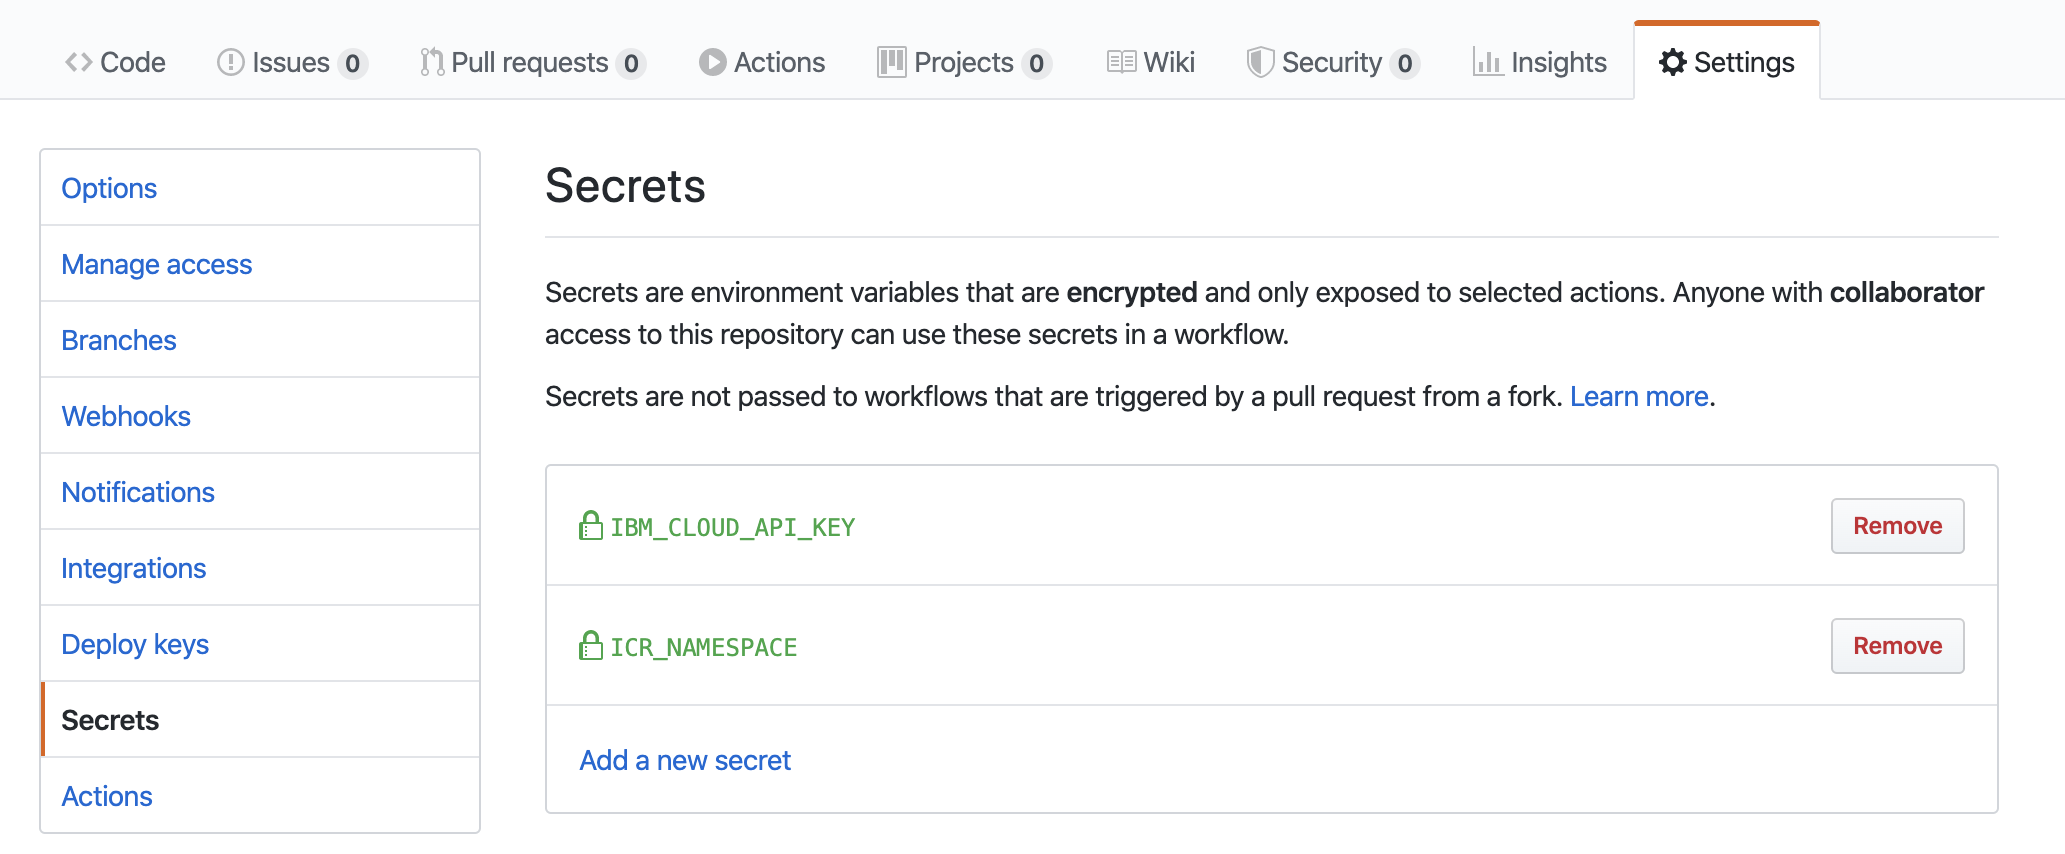
This next part defines a few of the variables that the script calls. Some of these are “Secrets”, which are saved in your repo settings and obfuscating in the logs, others are defined in the YAML. Really, the only one that needs to be a secret is the API key for IBM Cloud. Get a new IBM Cloud API key from the IAM settings.
The IMAGE_NAME, DEPLOYMENT_NAME, and PORT will vary based on what your application is doing. The REGISTRY_HOSTNAME and IBM_CLOUD_REGION will vary based on where your cluster is hosted. The IKS_CLUSTER can be the name or ID of the IKS cluster you’re using.
# Environment variables available to all jobs and steps in this workflow
env:
  GITHUB_SHA: $
  IBM_CLOUD_API_KEY: $
  IBM_CLOUD_REGION: us-south
  ICR_NAMESPACE: $
  REGISTRY_HOSTNAME: us.icr.io
  IMAGE_NAME: hello-python
  IKS_CLUSTER: bq1sm2gd0sjtps7ajoa0 # name or id of cluster
  DEPLOYMENT_NAME: hello-python
  PORT: 5001
This next part defines all the jobs and steps. We only have one job since we want the steps to run sequentially on the same container. If we break this up then we’ll have to start sharing context and other not-so-much things. Maybe we’ll solve this later.
The gist of this is we’re checking out the code base (this is a GitHub supported action), and then installing and authenticating with the IBM Cloud CLI. We’re also installing the plugins required to communicate with k8s clusters. The login step is where we use our IBM_CLOUD_API_KEY secret.
jobs:
  setup-build-publish-deploy:
    name: Setup, Build, Publish, and Deploy
    runs-on: ubuntu-latest
    steps:

    - name: Checkout
      uses: actions/checkout@v2

    # Download and Install IBM Cloud CLI
    - name: Install IBM Cloud CLI
      run: |
        curl -fsSL https://clis.cloud.ibm.com/install/linux | sh
        ibmcloud --version
        ibmcloud config --check-version=false
        ibmcloud plugin install -f kubernetes-service
        ibmcloud plugin install -f container-registry

    # Authenticate with IBM Cloud CLI
    - name: Authenticate with IBM Cloud CLI
      run: |
        ibmcloud login --apikey "${IBM_CLOUD_API_KEY}" -r "${IBM_CLOUD_REGION}" -g default
        ibmcloud cr region-set "${IBM_CLOUD_REGION}"
        ibmcloud cr login
Pretty vanilla stuff in the next two steps, we build the image and push it. The neat part about this is that we tag that version with the git SHA. The image is pushed to IBM’s container registry.
    # Build the Docker image
    - name: Build with Docker
      run: |
        docker build -t "$REGISTRY_HOSTNAME"/"$ICR_NAMESPACE"/"$IMAGE_NAME":"$GITHUB_SHA" \
          --build-arg GITHUB_SHA="$GITHUB_SHA" \
          --build-arg GITHUB_REF="$GITHUB_REF" .

    # Push the image to IBM Container Registry
    - name: Push the image to ICR
      run: |
        docker push $REGISTRY_HOSTNAME/$ICR_NAMESPACE/$IMAGE_NAME:$GITHUB_SHA
The next part is where we actually deploy our application. I got a little cheeky here and re-generate the deploy and service CRDs and apply them on every deployment, this way it works from a scenario where we don’t yet have the app deployed yet, too.
    # Deploy the Docker image to the IKS cluster
    - name: Deploy to IKS
      run: |
        ibmcloud ks cluster config --cluster $IKS_CLUSTER
        kubectl config current-context
        kubectl create deployment $DEPLOYMENT_NAME --image=$REGISTRY_HOSTNAME/$ICR_NAMESPACE/$IMAGE_NAME:$GITHUB_SHA --dry-run -o yaml > deployment.yaml
        kubectl apply -f deployment.yaml
        kubectl rollout status deployment/$DEPLOYMENT_NAME
        kubectl create service loadbalancer $DEPLOYMENT_NAME --tcp=80:$PORT --dry-run -o yaml > service.yaml
        kubectl apply -f service.yaml
        kubectl get services -o wide
What it looks like
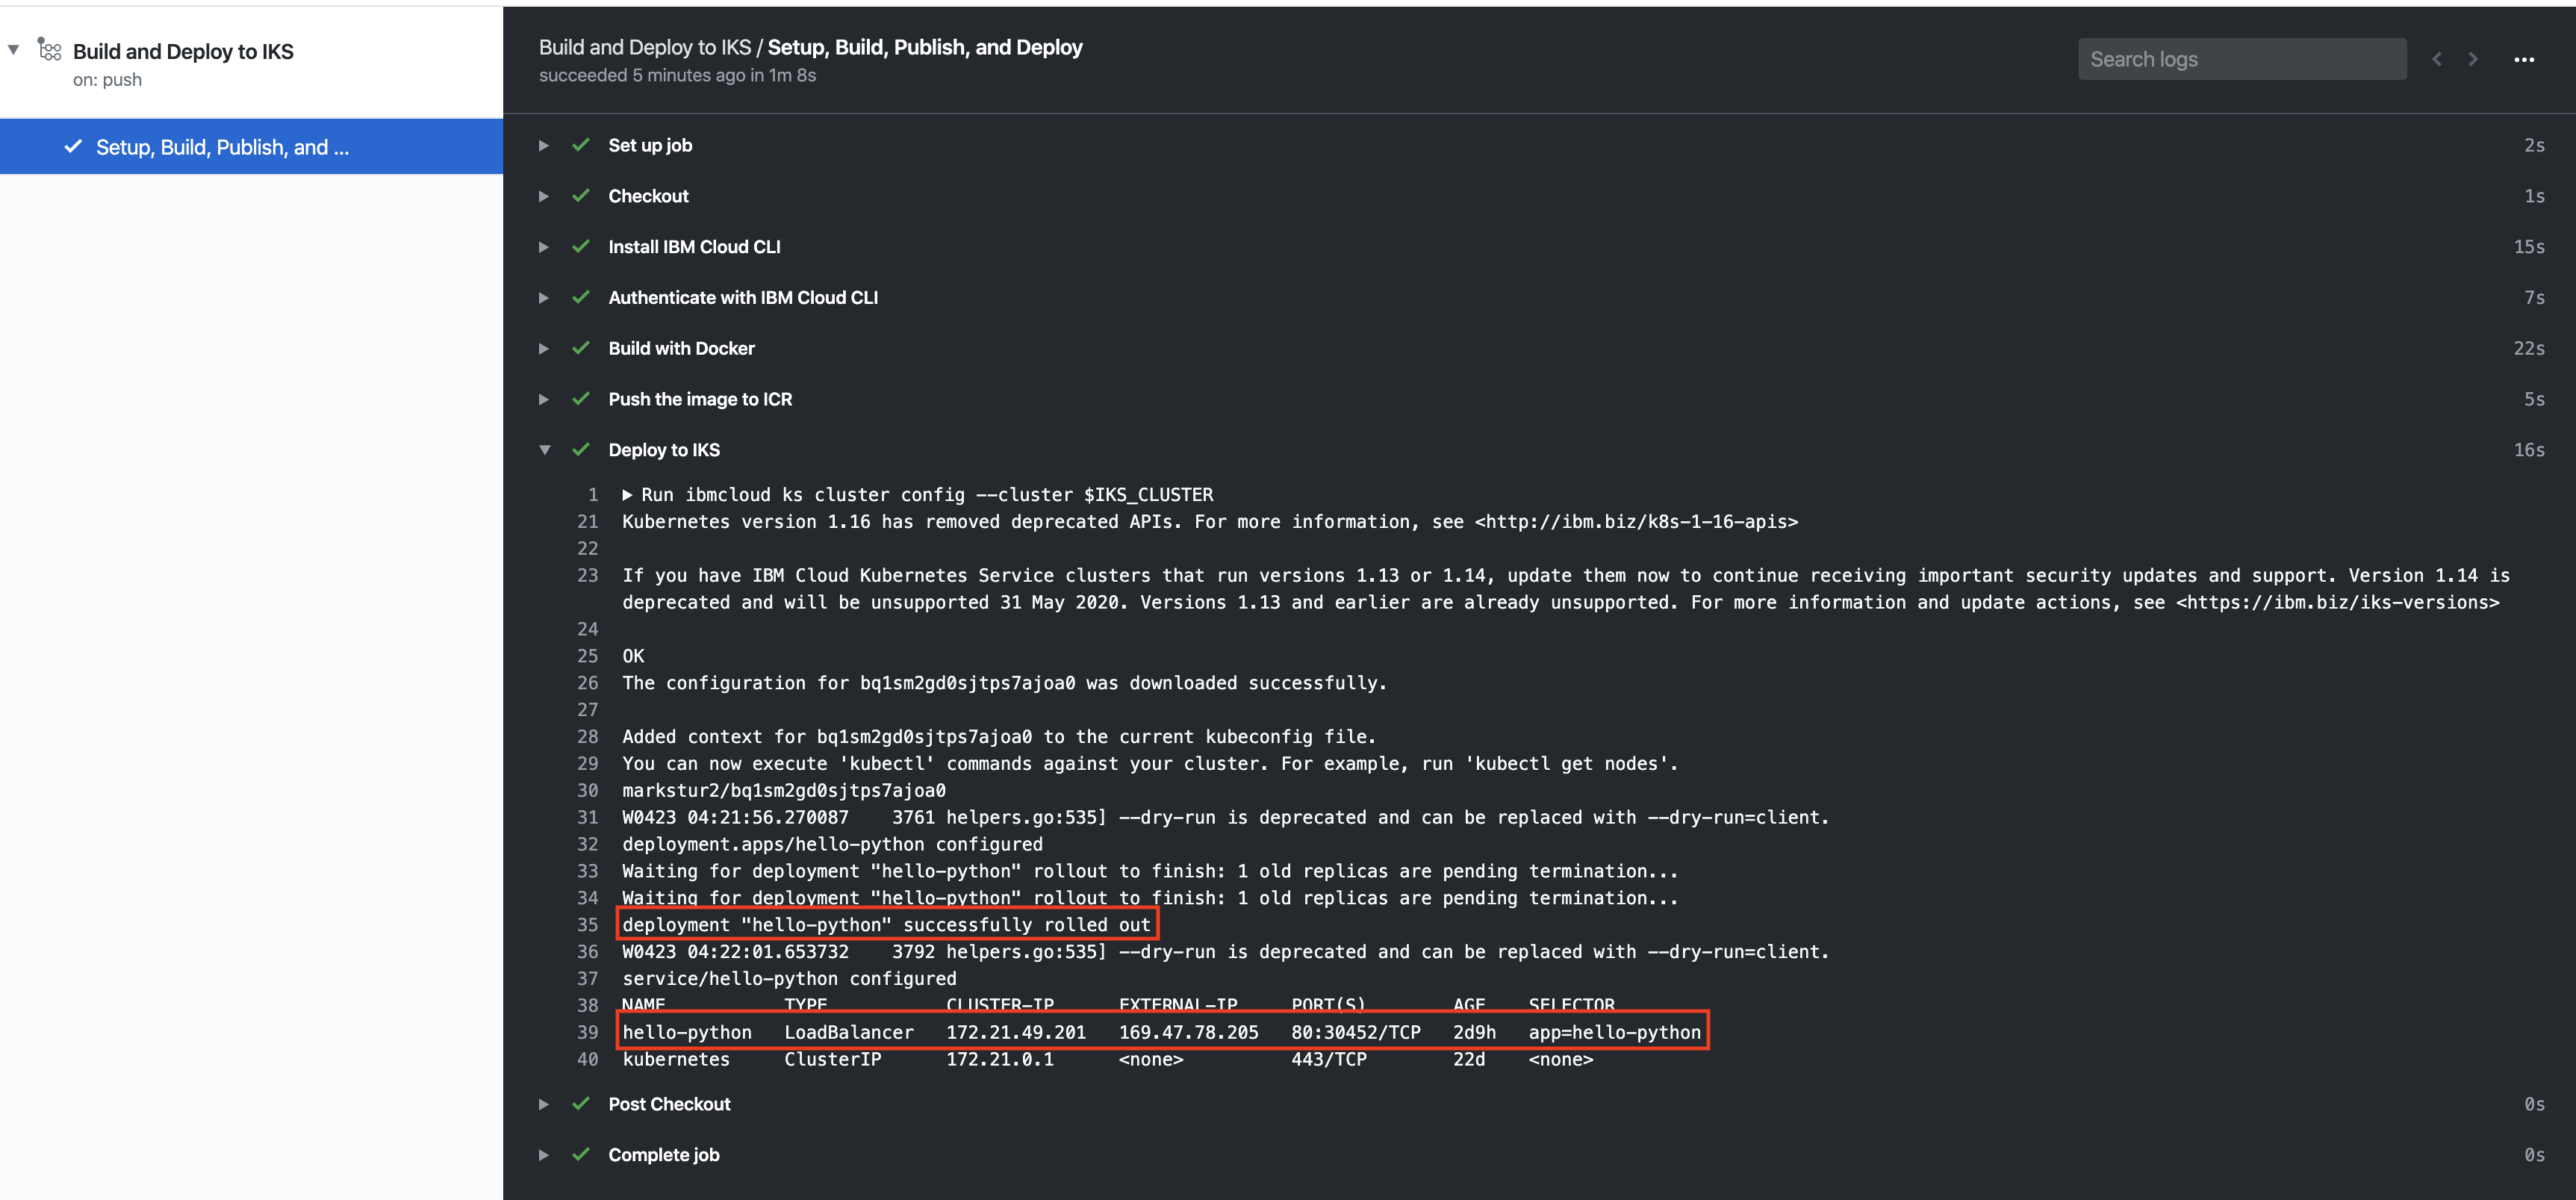
The GitHub Action UI is very nice and intuitive, you can see all the steps plainly and click on each one for expanded logs. We can see where our app is being hosted and if it was rolled out correctly.
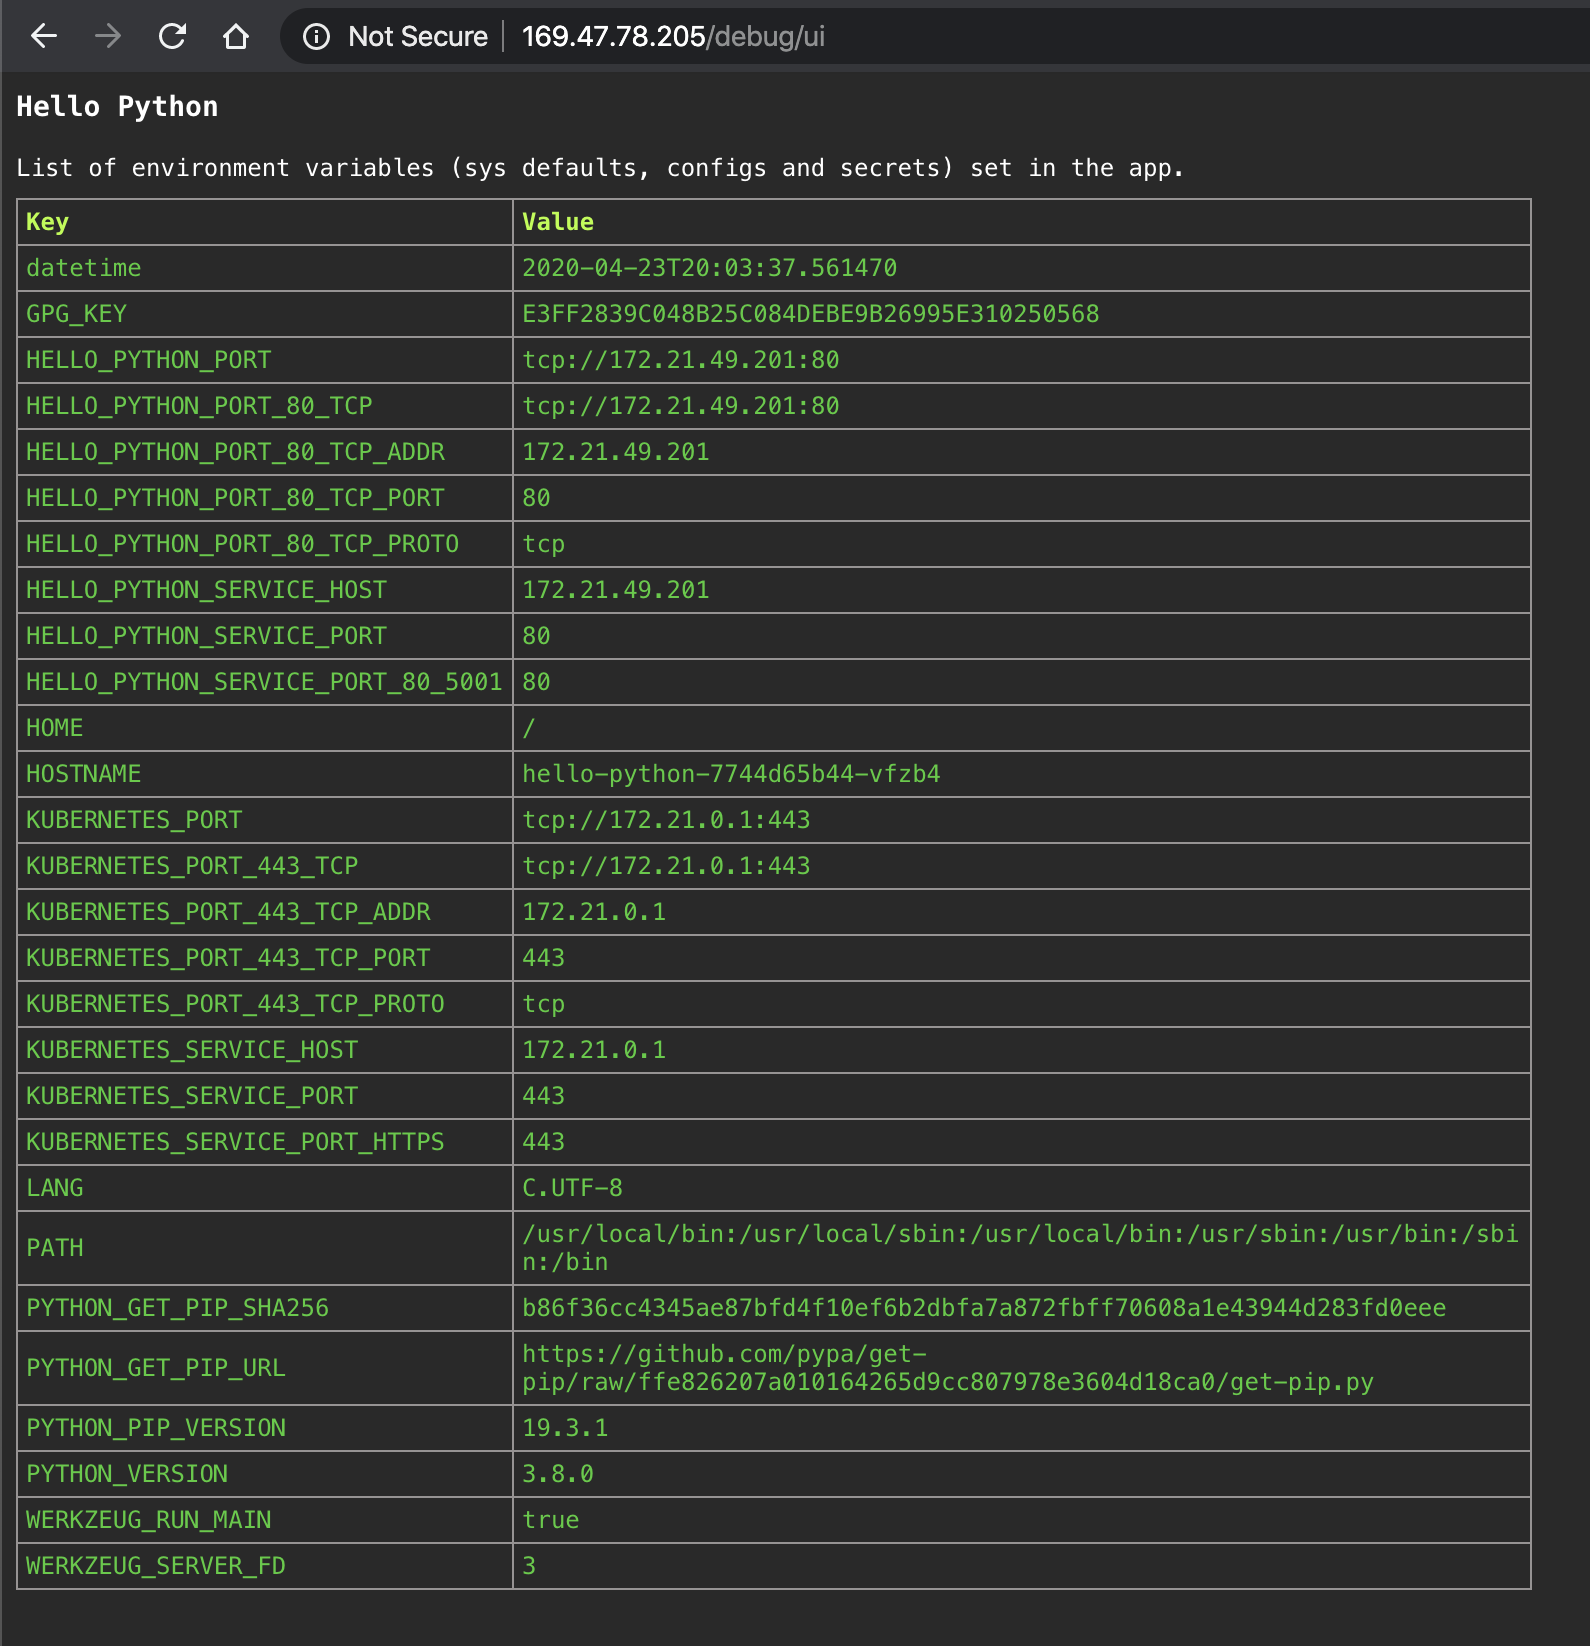
The application itself is pretty simple, just showing environment variables in a pretty table.
IBM Cloud bits
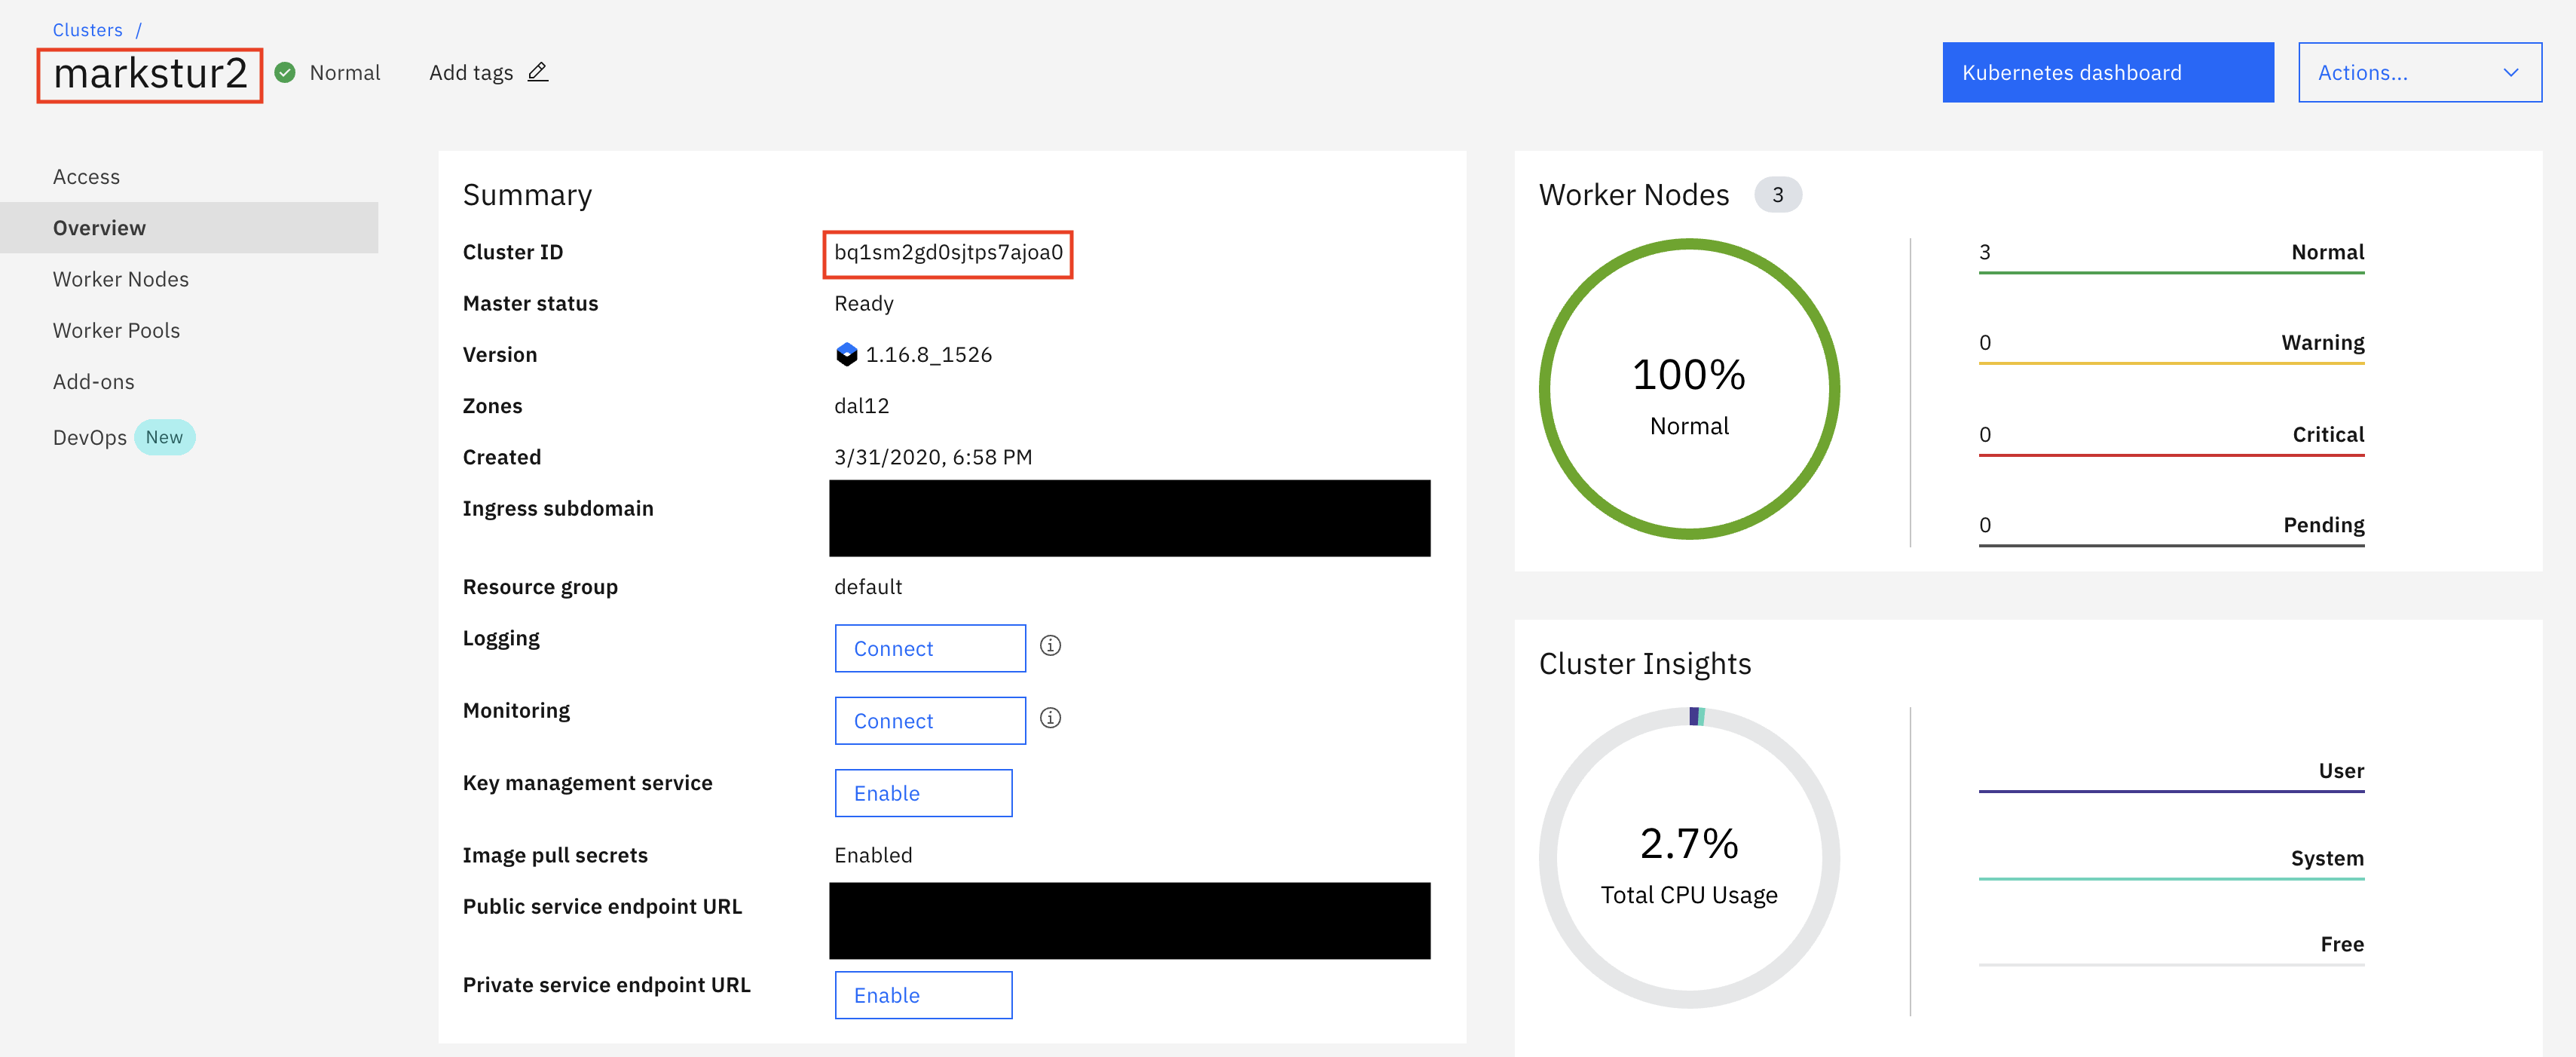
Well, first you’ll need an IKS cluster, any size will do. I’ve highlighted the cluster name and ID, either of these will work as the IKS_CLUSTER variable.
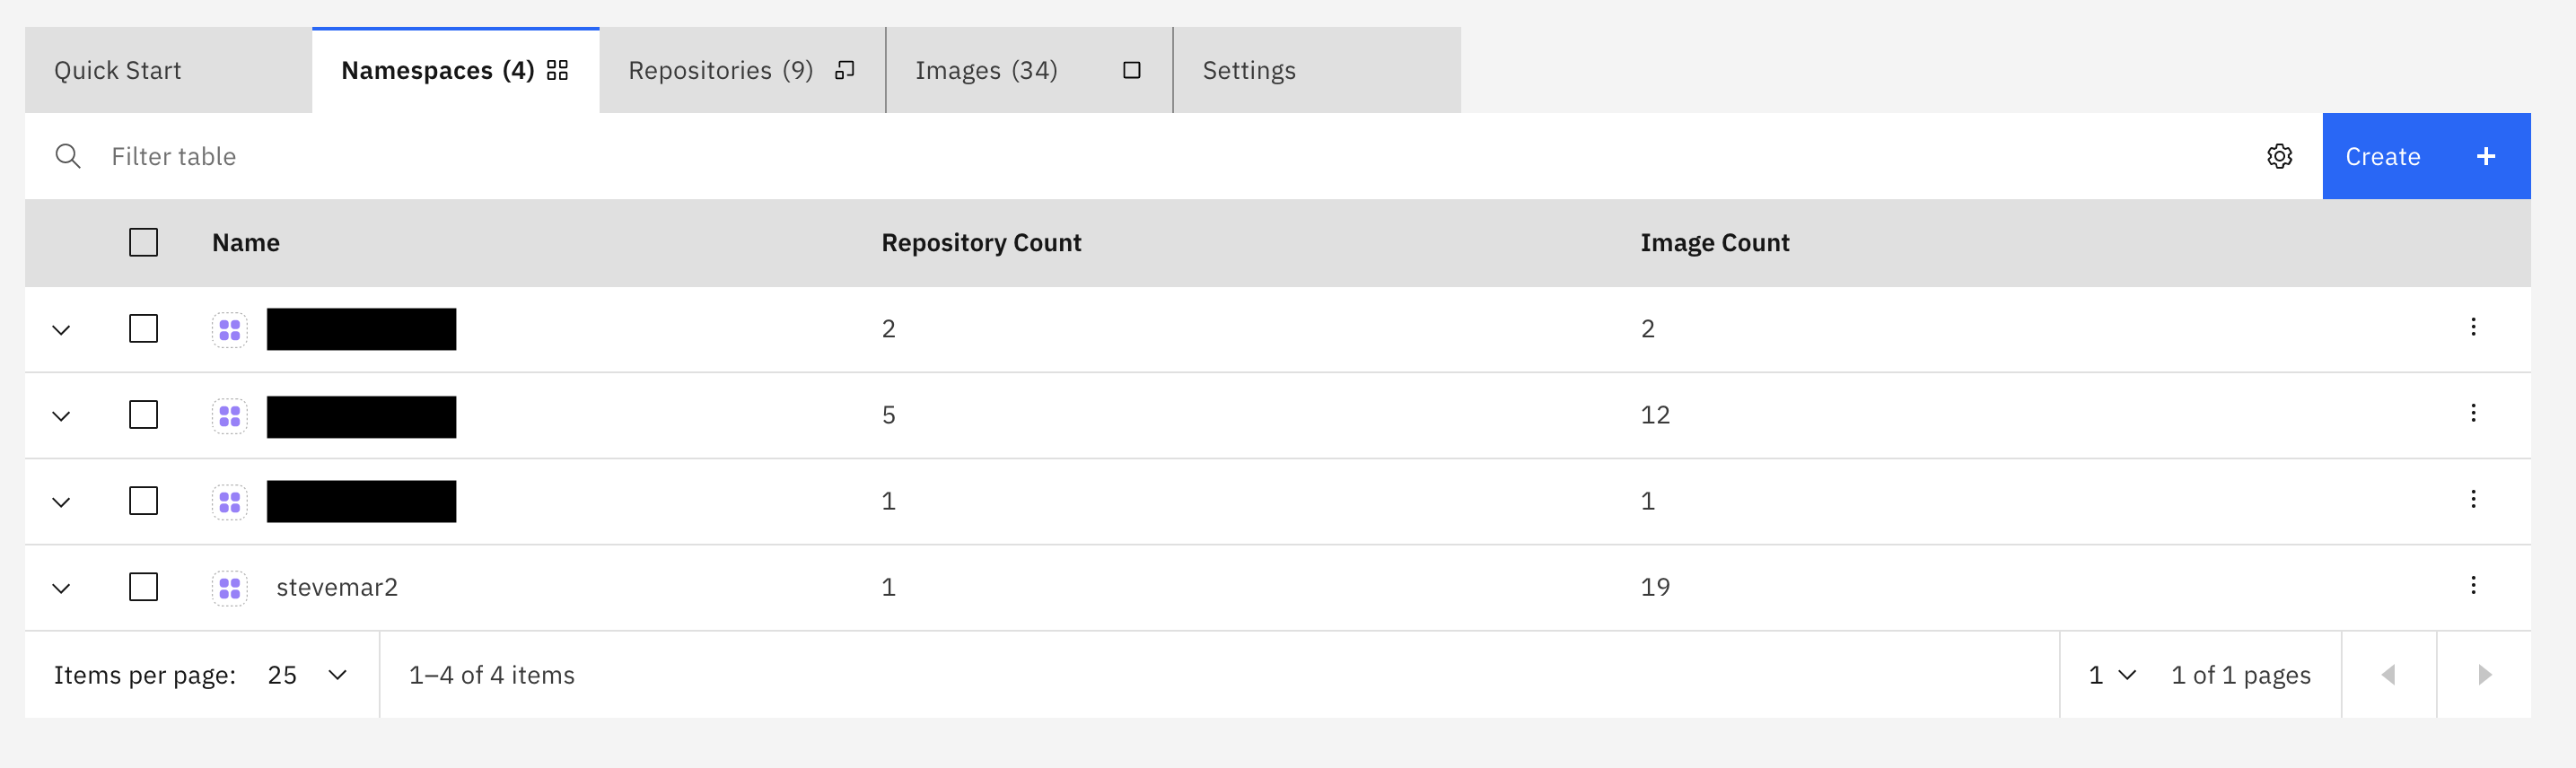
Then you’ll need a namespace in the IBM Container Registry (ICR), mine is stevemar2. You can get to your list here: https://cloud.ibm.com/kubernetes/registry/main/namespaces
And the last step is an IBM Cloud API key, which are available through the IAM settings

Summary
And that’s it! Overall, my first real experience with GitHub Actions was pretty good. Feel free to re-use any of this content or code, it should work provided your application isn’t too complex.