
CI/CD of serverless actions with Travis CI
This tutorial is a continuation of GitHub task automation with serverless actions.
Getting a serverless action to run is all well and good but what if you need to update it? In this tutorial, I cover the quickest way to set up basic CI/CD for OpenWhisk actions using as few dependencies as possible. We’ll use Travis CI, as it comes freely integrated with GitHub, and the IBM Cloud CLI, that’s it!
There’s one catch though, I have API keys in my serverless application. Wanting to keep things 12-factor(ish), I set these as environment variables. But how can I keep all the information in sync between my local workflow, IBM Cloud’s functions, OpenWhis, and Travis. Read on to find out now!
Here’s how it looks at a high level:
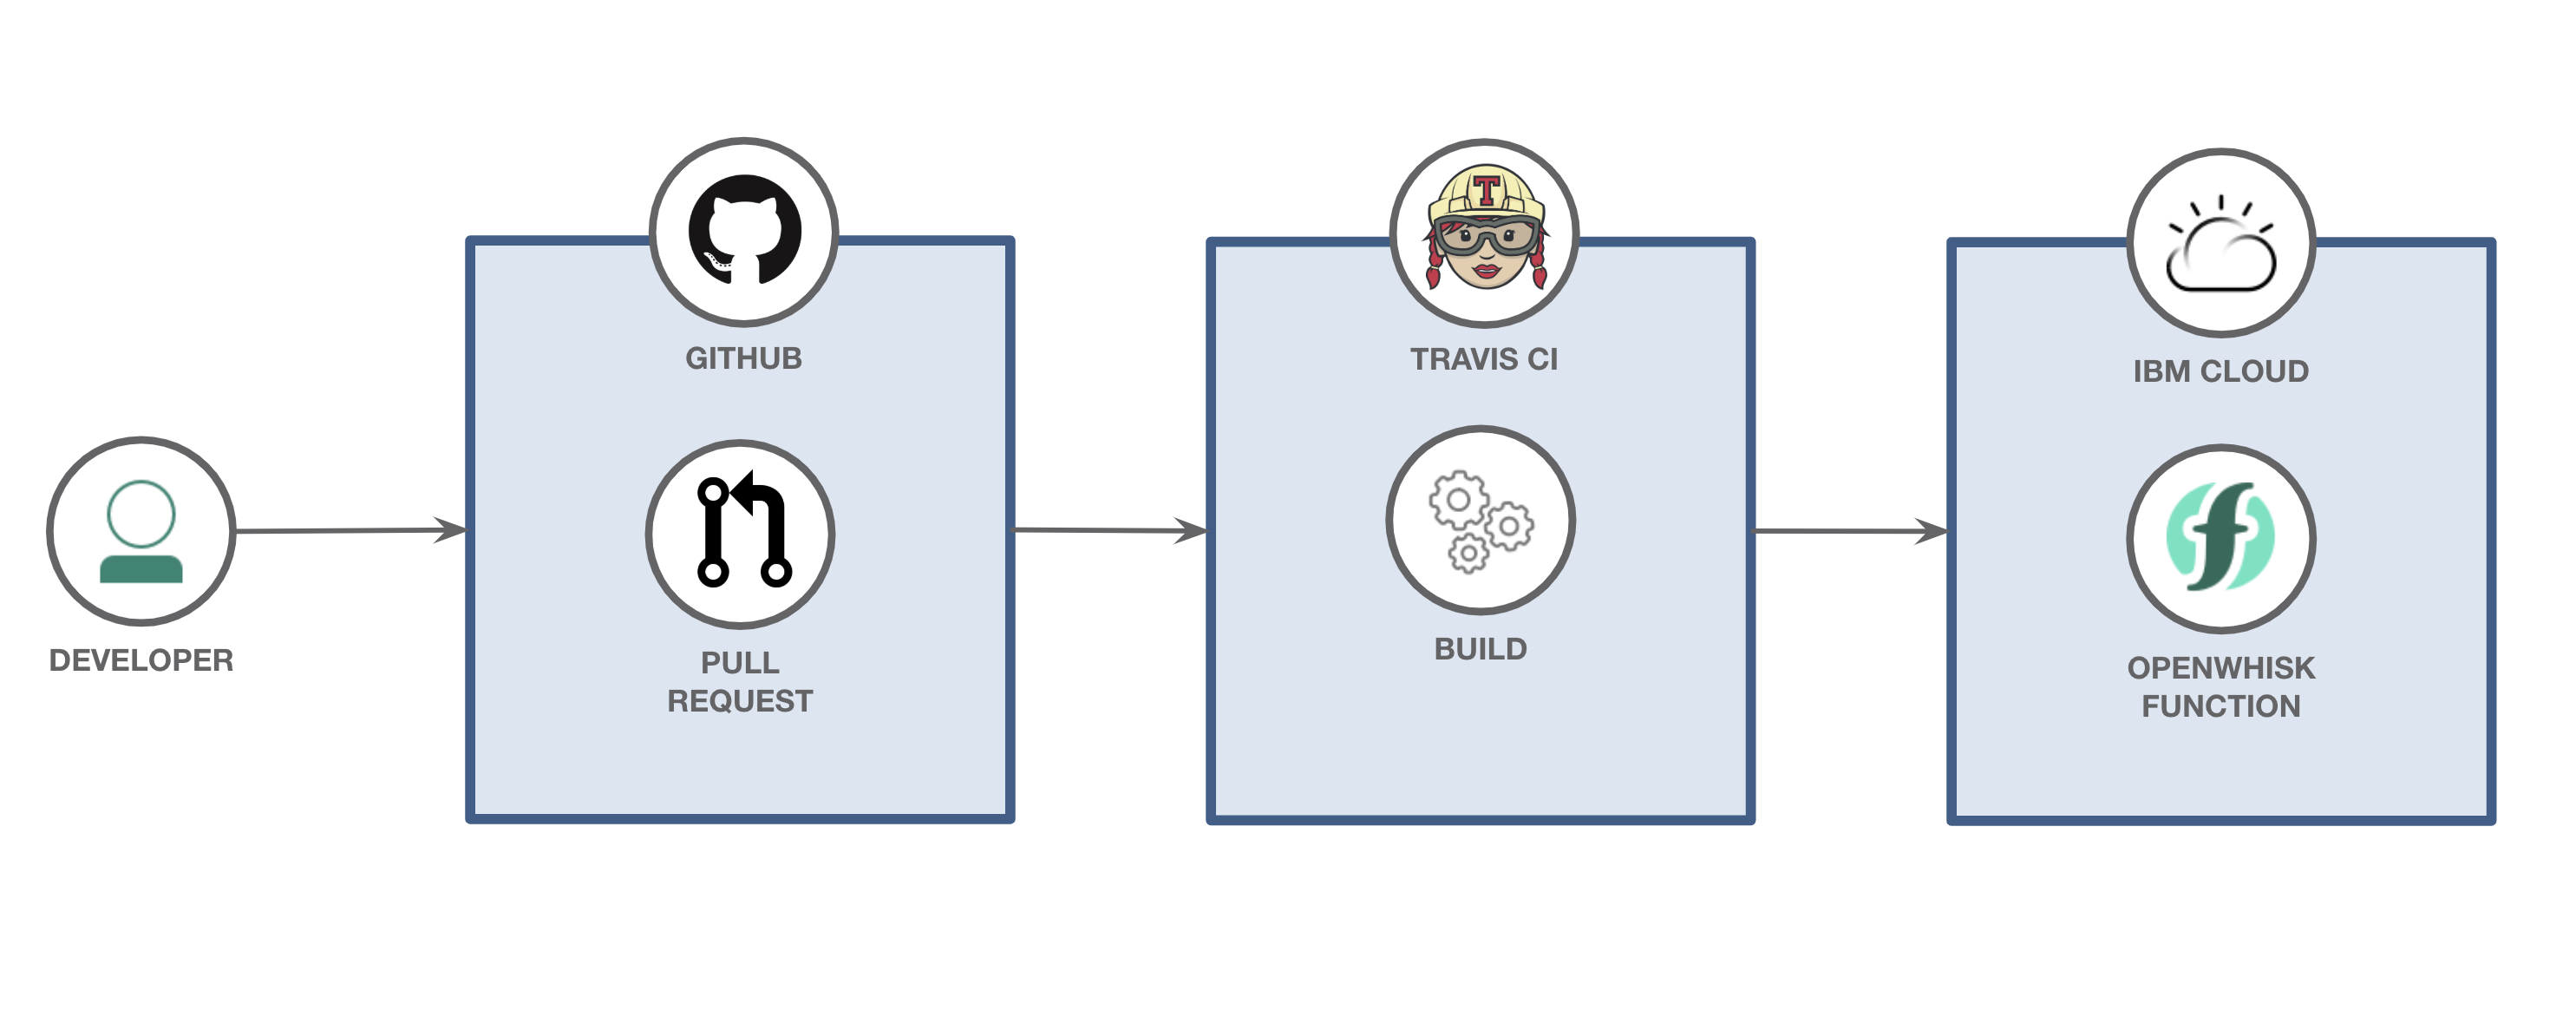
- A developer creates a new pull request to their GitHub repo that has their serverless code.
- When a pull request is merged, Travis CI kicks off a new deployment.
- The new version of the serverless action is redeployed to IBM Cloud.
Learning objectives
When the reader has completed this tutorial, they will understand how to:
- Use Travis CI to re-deploy their OpenWhisk package
- Use environment variables in their OpenWhisk package
- Leverage Travis CI to relay environment variables from OpenWhisk
Prerequisites
- A free tier IBM Cloud account.
- A GitHub account.
- A Travis CI account.
-
The IBM Cloud CLI, with the Cloud Functions plugin.
  ibmcloud plugin install cloud-functions
  ibmcloud plugin list
Steps
This tutorial is split into a few parts:
1. Generate an IBM Cloud API key and log into IBM Cloud
From the IBM Cloud console, click the Manage option, choose the Access (IAM) option, and then the IBM Cloud API keys tab. Or, just go to https://cloud.ibm.com/iam/apikeys.
Create a new IBM Cloud API key, give it any name you’d like.
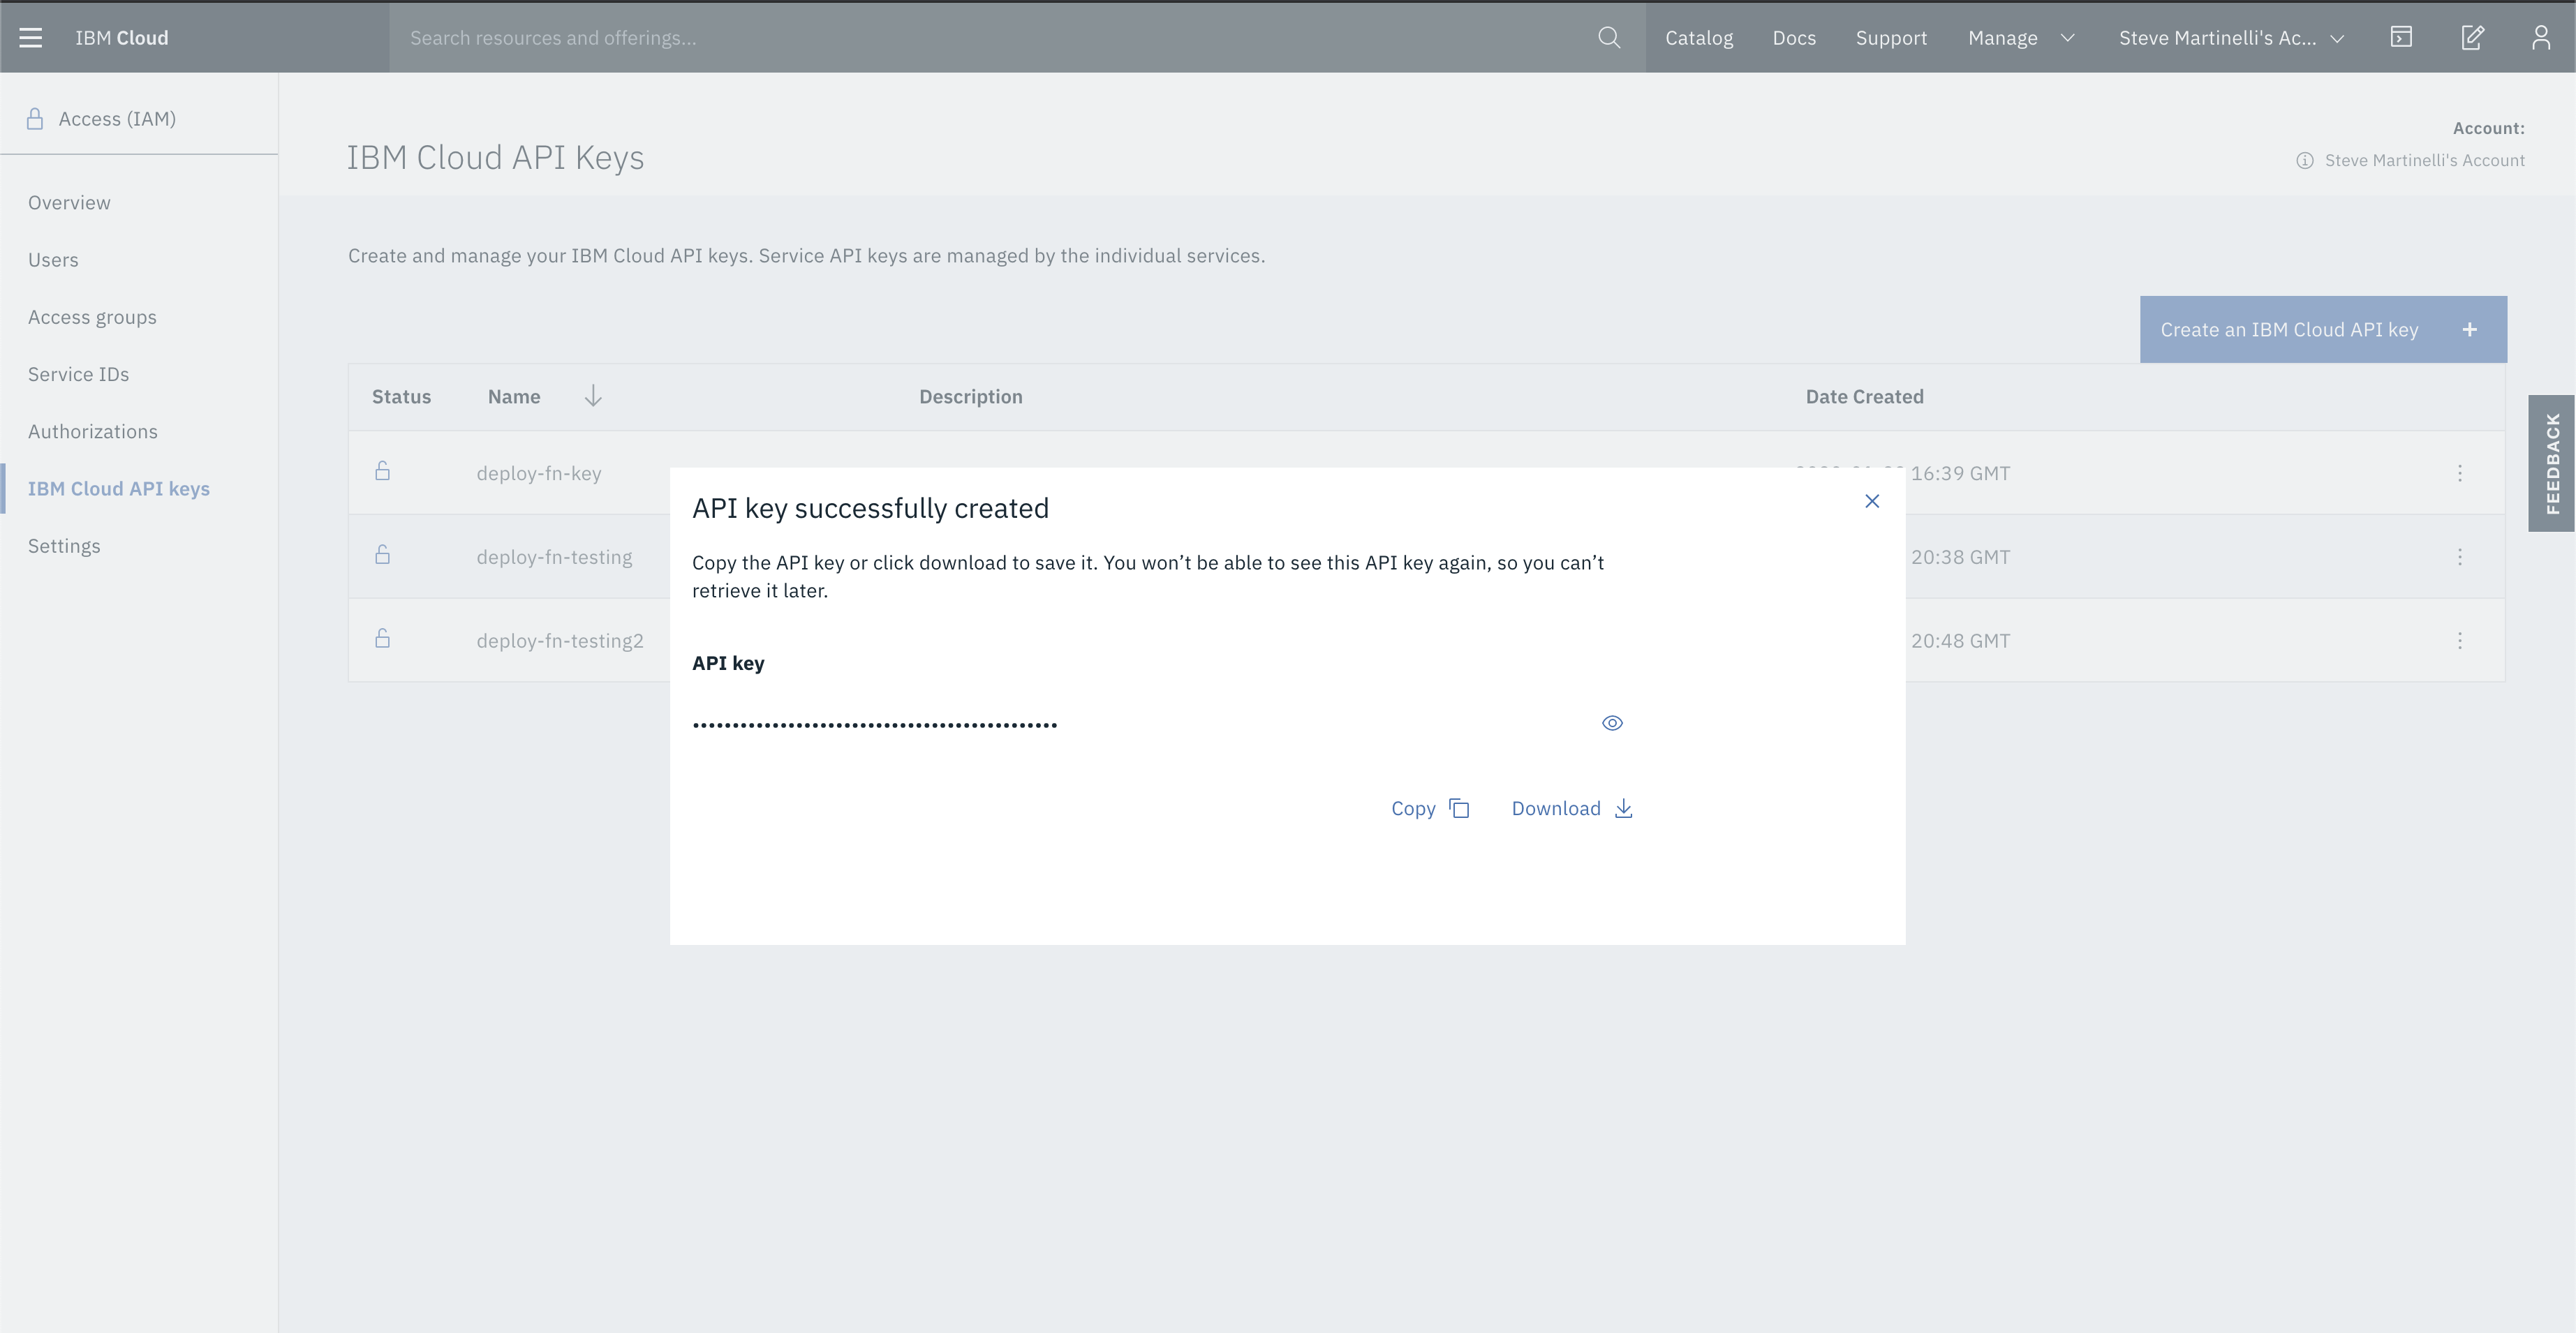
Click on the reveal icon to view the API key.
Now log into IBM Cloud using that API key.
ibmcloud login --apikey ${IBM_CLOUD_API_KEY} -r us-south
2. Create a new GitHub repo
To test the full workflow, we need to host our code somewhere. Choose to create a new repo by going to https://github.com/new or fork my repo.
Once you have an empty repo, create the following files:
main.py
We keep the action simple, the point of this is to see if the params dictionary, which would normally have the payload information from the trigger, will have the additional user defined environment variables. We’re going to define these in the manifest.yaml file (more on that soon), and set them using Travis CI.
def main(params):

    print(params)
    return {'message': 'Hello world'}
manifest.yml
This manifest file is an OpenWhisk concept and describes the overall package of functions for this project. It’s here that you specify your runtime (Python, Go, Node, etc), and the file to run.
The part that I will be leveraging is found in the section about handling environment variables.
The gist of our file:
- We point to our serverless action (
main.py) - Choose our runtime (Python 3.7)
- Leverage two environment variables,
PUBLIC_GH_TOKENandGHE_TOKEN, to be added as parameters to the action. The bit on the right$PUBLIC_GH_TOKENrefers to the local environment variable, the bit on the left (without the$) refers to the parameter name. It could have been named something else but I wanted to keep them the same.
packages:
    deploy_package:
      version: 1.0
      license: Apache-2.0
      actions:
        deploy_action:
          function: main.py
          runtime: 'python:3.7'
          inputs:
            PUBLIC_GH_TOKEN: $PUBLIC_GH_TOKEN
            GHE_TOKEN: $GHE_TOKEN
You could, before configuing Travis, pause here and deploy the action manually by first exporting a few environment variables:
export GHE_TOKEN=bar2
export PUBLIC_GH_TOKEN=foo
and then by running ibmcloud fn deploy while pointing to the manifest.
ibmcloud fn deploy --manifest manifest.yml
You should see a new Python based action in your function overview, and clicking it should show you have two parameters defined. That’s all well and good but it doesn’t give us any CI/CD, so delete it if you created it.
.travis.yml
Now to the critical part of this tutorial. Using Travis CI to re-deploy our app. How are we going to do this?
We’re going to do the same thing we did locally, that’s how!
- Install the IBM Cloud CLI (see the
curlcall) - Log into IBM Cloud with our API key
- Run
ibmcloud fn deployby pointing to ourmanifest.ymlfile. - That’s it!
This is how a minimal .travis.yml file looks like (with some extra linting using flake8), the bulk of the logic is done in deploy.sh, defined just below.
---
language: python
install:
    - pip install requests flake8
script:
    - flake8 --ignore=E501
before_deploy:
    - curl -fsSL https://clis.cloud.ibm.com/install/linux | sh
deploy:
    provider: script
    script: bash deploy.sh
deploy.sh
A minimal deploy.sh would look like this, where we re-run the same commands that we do locally, but within a Travis run. The only catch here is that we are using environment variables defined in our Travis CI settings instead of environment variables defined locally.
ibmcloud plugin install cloud-functions
ibmcloud plugin list
ibmcloud login --apikey ${IBM_CLOUD_API_KEY} -r ${IBM_CLOUD_REGION}
ibmcloud target -o ${IBM_CLOUD_ORG} -s ${IBM_CLOUD_SPACE}
ibmcloud fn deploy --manifest manifest.yml
ibmcloud fn list
3. Try it all out
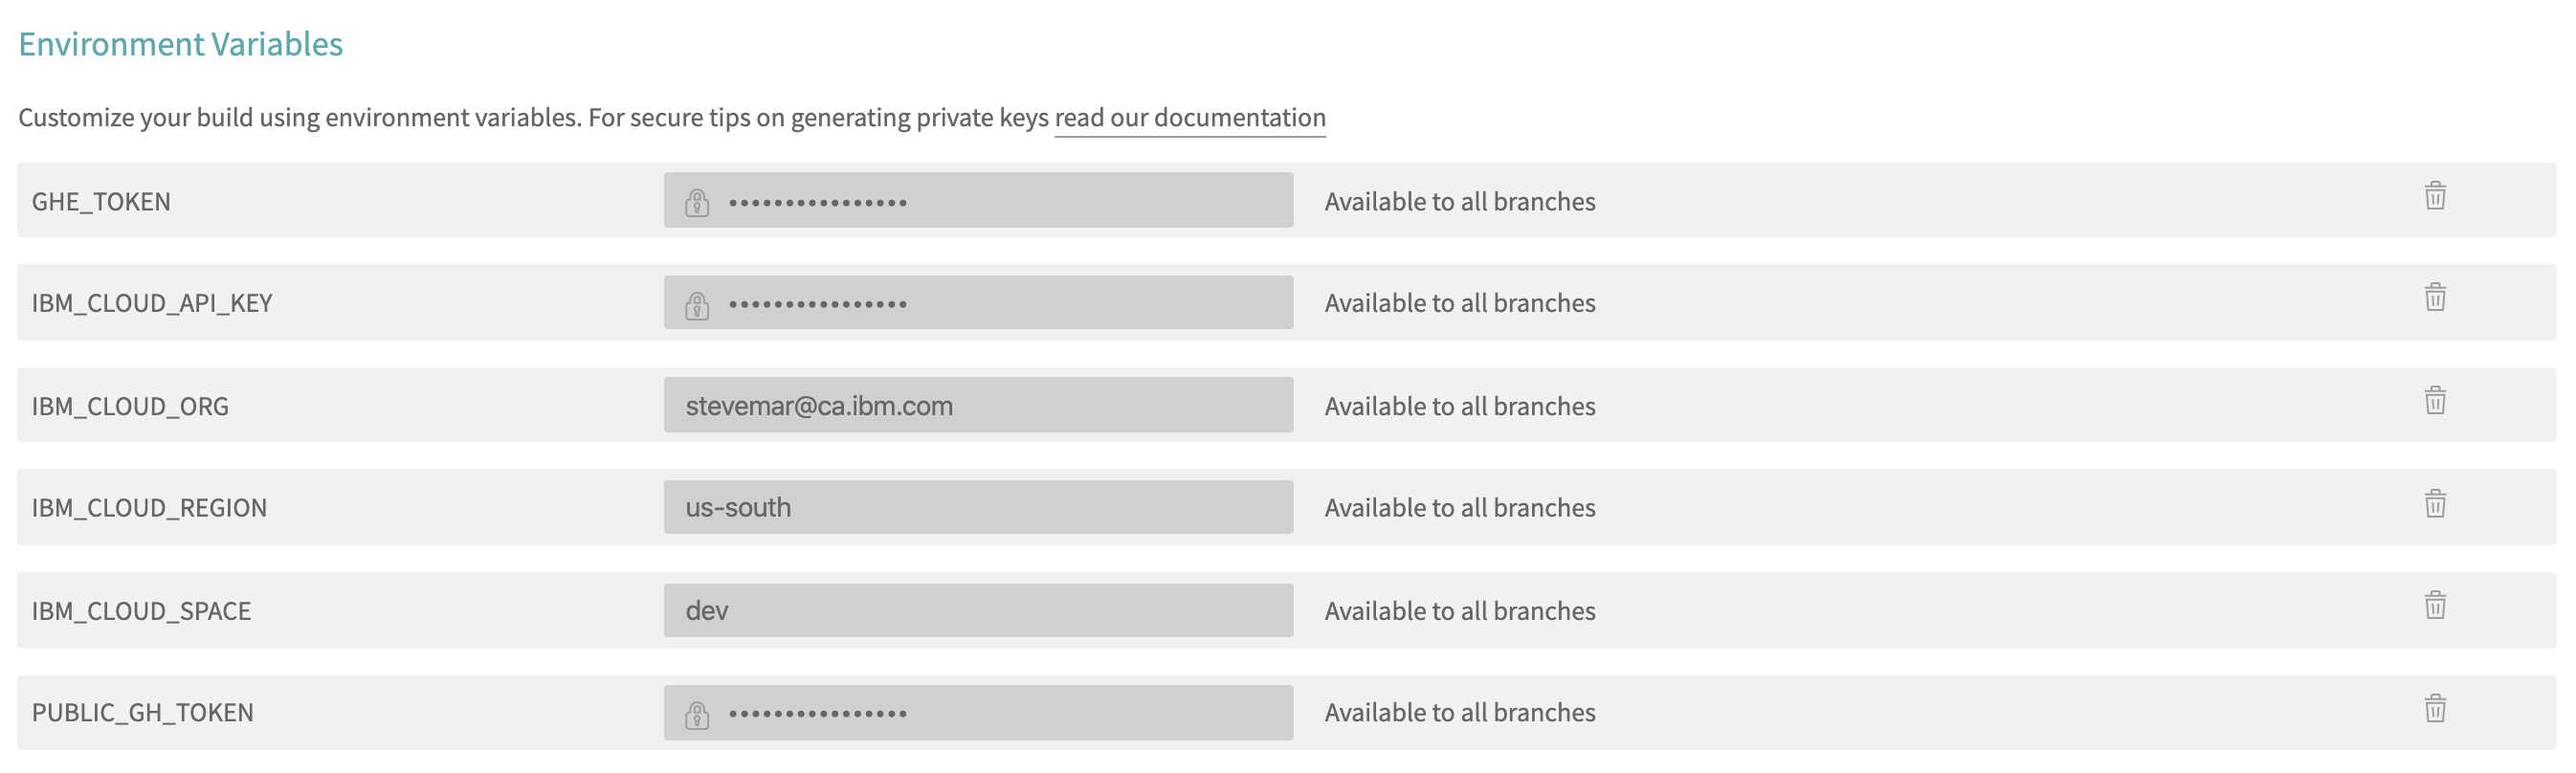
The first thing we have to do it set the environment variables that Travis CI needs. The IBM_CLOUD_* prefixed variables are needed by travis.yml (viz-a-via the deploy.sh script). I’ve allowed some of these to be visible, but your values will likely be different.
The GHE_TOKEN and PUBLIC_GH_TOKEN variables are defined here because they’ll be available to the shell, and called in the OpenWhisk manifest.yml deployment file.
Now let’s actually run it all together by pushing a nominal change to the repo, add a README.md for instance, then look at the Travis CI logs.
NOTE I’ve split the logs into sections so I can talk about each one, but the log itself from Travis CI will appear as one long block of text.
The output of the ibmcloud plugin install cloud-functions command.
Looking up 'cloud-functions' from repository 'IBM Cloud'...
Plug-in 'cloud-functions 1.0.36' found in repository 'IBM Cloud'
Attempting to download the binary file...
 13.03 MiB / 13.03 MiB [============================================] 100.00% 0s
13663826 bytes downloaded
Installing binary...
OK
Plug-in 'cloud-functions 1.0.36' was successfully installed into /home/travis/.bluemix/plugins/cloud-functions. Use 'ibmcloud plugin show cloud-functions' to show its details.
The output of the ibmcloud plugin list command.
Listing installed plug-ins...
Plugin Name                        Version   Status
cloud-functions/wsk/functions/fn   1.0.36
The output of the ibmcloud login --apikey ${IBM_CLOUD_API_KEY} -r ${IBM_CLOUD_REGION} command.
API endpoint: https://cloud.ibm.com
Authenticating...
OK
Targeted account Steve Martinelli's Account (57f26d794bc80a632267dff4803ed6a0)
Targeted region us-south
API endpoint:      https://cloud.ibm.com
Region:            us-south
User:              stevemar@ca.ibm.com
Account:           Steve Martinelli's Account (57f26d794bc80a632267dff4803ed6a0)
Resource group:    No resource group targeted, use 'ibmcloud target -g RESOURCE_GROUP'
CF API endpoint:
Org:
Space:
Tip: If you are managing Cloud Foundry applications and services
- Use 'ibmcloud target --cf' to target Cloud Foundry org/space interactively, or use 'ibmcloud target --cf-api ENDPOINT -o ORG -s SPACE' to target the org/space.
- Use 'ibmcloud cf' if you want to run the Cloud Foundry CLI with current IBM Cloud CLI context.
The output of the ibmcloud target -o ${IBM_CLOUD_ORG} -s ${IBM_CLOUD_SPACE} command.
Targeted Cloud Foundry (https://api.us-south.cf.cloud.ibm.com)
Targeted org stevemar@ca.ibm.com
Targeted space dev
API endpoint:      https://cloud.ibm.com
Region:            us-south
User:              stevemar@ca.ibm.com
Account:           Steve Martinelli's Account (57f26d794bc80a632267dff4803ed6a0)
Resource group:    No resource group targeted, use 'ibmcloud target -g RESOURCE_GROUP'
CF API endpoint:   https://api.us-south.cf.cloud.ibm.com (API version: 2.144.0)
Org:               stevemar@ca.ibm.com
Space:             dev
The output of the ibmcloud fn deploy --manifest manifest.yml command.
Success: Deployment completed successfully.
The output of the ibmcloud fn list command.
Entities in namespace: default
packages
/stevemar@ca.ibm.com_dev/deploy_package                                private
actions
/stevemar@ca.ibm.com_dev/deploy_package/deploy_action                  private python:3.7
The last step is to go back to the Functions console on IBM Cloud to verify everything is deployed.
Just like when the action was deployed manually, the action is listed, our simple action is shown, and the parameters were relayed from Travis CI to OpenWhisk.


Summary
Hope you enjoyed reading this tutorial as much as I enjoyed writing it. I hope you can re-use it for your own organizational workflow.